0

Pine Cones for Our Christmas Tree


Since the start of November my craft world became crazier. Conceptualizing then creating craft items for our home then started to accept christmas orders. Aside from that creating also for The Daily Scrapper plus pending jobs. On the side, during my break time, I sit and make list of my set menus for my catering business. So far, time is great to me eventhough when I put Joseph to sleep at 8:45pm, I fall asleep, to. hahahahahahahahahahahahhahahaha. Darn! How I wanted to go back to my craft room when my son is fast asleep but I'm off to dreamland hahahahahaha. I thnaks God coz we are all healthy inspite of that swineflu anywhere in the world. Which reminds me that we need to look for a center to have us vaccinated. Is it necessary? I'm kind'a scared about the effect :(

Last Nov 18, I was able to finish one of the Christmas decors for our 2009 Christmas tree. It was fun (as always) and easy to make, promise!

Here's the main material needed. Would you believe that my son and I would collect pine cones along the way during the end of summer? It has become a habit of mine since I got pregnant last 2002. Yup! We have lots of pine cones down in the basement hahahahahahahha - different sizes and styles =D

I decided to use the not so small and not so big pine cones for our christmas tree decor this year. Will use the jumbo ones maybe for candle arrangement ... it depends on my mood hehehehehhehe.


0

TDS Issue #21 : Defining Me

Woot! Woot! I'm so proud of myself for creating this Mix Media Hybrid Collage about me as a crafter. I enjoyed every minute of it and will definitely continue to create more mix media art in the future.

To be honest, the concept of "defining me" gave worries and apprehensions. I just couldn't decide which part of me should I define. I made some list and it was endless :( At last, I just concentrated on me being a crafter and I'm so glad I did this.

Here's my project http://www.thedailyscrapper.com/2009/issue21nov/Hybrid.html Just click the picture of my project and you will be directed to the details of my project. Don't forget to read everything on my project page =)

Plus on this issue TDS is giving away a huge digital freebie kit by Divine Digital. Sad to say the first part already expired and hope you can all forgive me once again for not posting earlier - been very very very busy :( But, grab the second part of the kit coz it's reallu huge =)

Here's the link to the freebie page http://www.thedailyscrapper.com/2009/issue21nov/interview_divinedigital_kit.html
0

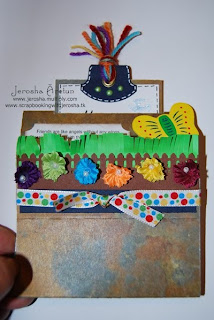
6th Challenge VCMW : Free Standing Pop-Up Card

This is the last challenge for our VCMW. It took me forever to post this set of cards due to so many things that I have to deal with. Besides, we decided to take a break due to other priorities that came along. These last challenge was created last Oct 24, 2009.

I hosted the last challenge and the rule is to simply make a Free Standing Pop Up Card of any theme. Kind'a tricky to adhere the base but got used to it after making the first card for this set.

Materials Used:

Cardstock by Panduro
Sizzix Die
3D flowers from Philippines
Polka Dor ribbon by American Crafts
SU Tab Punch
MS Picket Fence Edge Punch
Pearl Maker
Yarns
White and Black Pen
Goldd Eyelet
Color Box Pad
Wooden Butterfly by Coop Forum

0

Recycling Old Christmas Tablecloth


I bet you guys don't have any idea how addicted I am when it comes to fabrics. Yeah, I'm not into sewing like you guys do but I know how to sew simple curtains and tablecloths. When I go out for shopping either craft goodies or shoes, clothes, bags, jewelries, decors, and kiddie items, I would buy fabrics whenever I see that attracts my attention. I also have a habit .... bad habit maybe ... that after using the fabrics specifically as curtains or tablecloths I just DON'T WANT to use it again. Bad of me, huh?

To be honest, I tried many times to use it again whatever fabric that I have but it just gives me the unhappy feeling so I end up buying new ones to bring back the smile on my face.

What do I do with "I don't want it the second time around fabrics?" Well, as I've said I give it away ..... or just hidden in the basement. BUT, things change and now I started recycling them.

To start with, I played with my christmas tablecloth I used once 4 Christmases ago hehehhehehehehehhehe. It's a waterproof fabric and the designs are so joyful that I decided to turn it into a wall decor for this jolly season.


0

TDS Issue 19 : Recycling


Geez! Here I am again forgetting to post the previous issue of The Daily Scrapper. It's one of my favorite issue so far coz it's all about recycling. Come to think of it, there are so many things that we can recycle inside our home and it's just a matter of looking and simply being creative.

For this issue I made my own acid-free papers from m cardstocks. My son and I had so much fun doing this project for almost one whole day and I would say my son really enjoyed every minute of it.

Here's the link to my project: http://www.thedailyscrapper.com/2009/issue19kul/Hybrid.html

I suggest you browse through the issue coz you will get lots of awesome ideas =)
0

TDS Issue 20 - Thanksgiving


For this issue I created Wine Glass Markers perfect for your thanksgiving gathering. Be sure to view the page where my tutorial is coz you will find the meaning of each wine glass marker that I created.

Here's the link to my project : http://www.thedailyscrapper.com/2009/issue20tme/Hybrid.html

Also, if you love cats then you will be delighted to TDS Digital Kit for the issue so hurry and download the kit while it is still available. Here's the link to the kit : http://www.thedailyscrapper.com/2009/issue20tme/interview_creativevictorian1.html

We don't have Thanksgiving celebration here in Sweden but I'm always as in always thankful for what God has given me and so I would like to greet you all HAPPY THANKSGIVING!
0

5th Challenege - VCMW : Step Stair Card

My very first time to create a step stair card and it is simply the rule of the day - create a step stair card =)

Geez! With less sleep for the past few days my mind couldn't think clearly. It took a lot of time for me to conceptualize the design. What I have in my mind is to create a card that represents my 2 great crafty friends plus me. So, I opted to make a FRIENDSHIP card. I adore vibrant colors so I definitely used some of the bright colors that I have.

Materials Used:

Cardstocks by: Panduro, DCWV, Laura Ashley

Punchers by Martha Stewart : Doily lace, Double Scallop, Floral Lace

Promarkers: poppy, berry red, maroon, rose pink, pastel pink, dusky pink, pumpkin, lemon, canary, meadow green, apple, marsh green, pastel green, cornflower, lilac, blush, ivory, warm grey 2, warm grey 4, cool grey 5, black

Blending Chalks
Cuttlebug Embossing Folder - Distressed Stripes
American Crafts Ribbon
Perma Crystal Beads
Spellbinders - Scallop Rectangle
Stickles
Bungers Mini Brads
Tim Holtz Distress Ink Pad: Antique Linen, Old Paper
Memento Dye Ink Pad - Tuxedo Black
Greeting Farm Rubber Stamps - Rain, Snow, Shine
Crafty Individuals Rubber Stamp - # CI-234
Sentiment Stamp by Panduro - Forever Friends
Acetate
White Pen by Sakura


0

4th Challenge - VCMW : Pop Up Card

Rule of the day:
We will be using color scheme: black & white with any one other color.

Creating Pop Up Cards is really fun but a little engineering is kind'a the wacky part. It's not my first time to create a pop art card so it's not a new thing for me but there are many ways to create such a card from the simplest technique to the intricate ones.

I created a card with a theme of THANKFULNESS. I'm so thankful that I met Joan and Claire, which by the way we are the 3 crafters doing this VCMW. I'm thankful because they have been guiding me in many ways and we have nourished our friendship as much as we can. I'm thankful because of them I learned many wonderful things in the world of paper crafting. Most of all, I'm so thankful that we 3 agreed to have this Virtual Card Making Week as our way of bonding moments PLUS, I'm beginning to feel comfortable in card making.

Materials:
Cuttlebug Embossing Folder - Thank You
CTMH Stamp Pad - White Daisy
Versacolor Stamp Pad - Black
DCWV Cardstocks (Black, Emerald Green, Orange)
Panduro Ribbon
Panduro Buckles
Panduro Girl Paper Clip
Panduro Double-Sided Cardstock
Pearl Maker - White
Inkadinkado Clear Stamp (Sentiment)
Black Crystals
MS Edge Puncher - Picket Fence
Panduro Mini Flower Puncher

These are my previous pop-up cards:
http://jerosha.multiply.com/photos/album/63/Card_SWAP_Anniversary_Cards

http://jerosha.multiply.com/photos/album/47/Baptism_Pop-Up_Match_Box_Card

Made a mistake of using more than 1 color hehehehehehehehe but my card was accepted =D


0

3rd Day Challenge - VCMW : Unusual Shaped Card

Rules for the Day :
  1. is to make an unusual shape card WITHOUT using Cricut Machine or any Die-Cut Tool and commercial stencils or templates.
  2. stamping is a must.
Geez! This is like working and creating back in the old days were paper crafting is simply done by hand ... pencils ... and scissors.

Creating my own template is not a first time for me coz I have done own my diaper card and shoe case card this year:
http://jerosha.multiply.com/photos/album/109/Diaper_Cards_Inside_and_Out_D
http://jerosha.multiply.com/photos/album/108/Shoe_Case_Cards_and_The_Mice_..._Together

As always I had fun creating the 3rd challenge for the day. I really enjoyed stamping and coloring the dress .... adding crystals and ribbons. It was like during my college days in Fine Arts, when I had to design 12 textiles as part of my theses. We were required to make each design at 60 x 40 size illustration board and all drawn and hand painted!!!!

Anyway, here are the materials I used in creating the set of cards:
Kuretake cardstocks
Swiss Dots Cuttlebug Embossing Folder
Acrylic Stamps by: Mandy's Zoo, Inkadinkado, Printworks
ProMarker Pens : Lilac, Amethyst, Cinnamon, Emerald, Marsh Green, Agean
American Crafts Ribbon
Crystals
PearlMaker
Kuratake Eyelet

Haahahhahahahahahaha if you will look closely, the shape of my card is not perfect BUT i'm still proud of it coz the set was made with so much love, joy, and laughter.
Stamping the skirt is really an enjoyable moment for me =D


0

(Flower Shaped) Christmas Money Holder

I'm not in my real self this day :(
A big event is coming for me - will be catering for 60 people!!!! I'm so glad I have my friend to do this venture together. It all started when she asked if I would love to cater for 30 people the other Sunday and said yes and it was a huge success :O

I couldn't concentrate on what set of menus we will be presenting plus we're going to have a food sampling within this week. Although I have prepared set menus last week, the coming event will be kind'a different coz it will be more of Filipino food ... I think. I do have secret recipes when it comes to Filipino food but part of me is not in so much favor. Most of the guests are swedish and I know they love Thai food so I guess mix of swedish, thai, and filipino food will be the best. Oh well, we'll see ...... my friend and I will have a meeting tomorrow. The funny thing is we just wanted to have extra money to burn hahahahahahaha and we're not planning to put up a catering business ... for now. Both of us are just playing like little kids hahahahahahaha.

Due to my mind's instability this day, I ended up creating sets of flower-shaped Christmas money holder. Remember my last year's money bag holder? http://jerosha.multiply.com/photos/album/84/Money_Bag_Cards_for_Christmas_2008

Didn't want to make the same style this year so this day i decided to create flower shapes instead. Maybe tomorrow will create more but different style =D

Materials:
largest Spellbinder - Scallop Nestablities
Spellbinder - Round Nestablities
Bear Shaped Clear Stamps ( no brand - from a magazine)
CTMH Stamp Pad - Daisy white
Red and Green Ribbons
left-over cardstocks
"God Jul greetings" rubber stamps by Slojd o Detaljer
"Happy New Year " rubber stamps by Panduro
Promarkers to color stamp images
Martha Stewartt Edge Puncher - checker board
Pearl Maker - Gold and Silver
3D foam pads
light brown craft chalk


Sample of Back part is below.
0

2nd Challenge - VCMW

Rules for the day: a Halloween or a Christmas Card using 1 image cut by Cricut Expression, 2 stamped images (colored, if possible) and 1 image cut using your Spellbinder dies. You are free to use any color scheme or any sketches that pleases you.

Whew!
When I read the rules for the 2nd day, it literally gave me shivers coz I only played with my cricut once and that was when I tried my SCAL. After that day I had no time to play more with my cricut :(

Being a not so "techy" person, I have no exact idea how the machine really works but I just have to try my best in order for me to complete the requirements for the day.

Materials Used:
Ornament Background Rubber Stamp by Panduro
Embossing Powder (Black)
Promarkers : ice grey 1, sandstone, blossom, maroon, and marsh green
Crystal beads for the christmas tree
(unbranded) Christmas sentiment clear stamp
Cricut Cartridge - Stretch Your Imagination
Spellbinders
SU Ticket Punch

Lessons I learned for the day:
1. It's so nice to color intricate images when the image has been embossed.

2. Know you cricut machine well en toto play, play, play.


0

1st Challenge VCMW: Kaleidoscope Card

Some people call it Pyramid Card and to some it is Kaleidoscope Card but one thing for sure it is indeed layering =O

My 2 great crafty friends and Iagreed to have a Virtual Card Making (VCM) wherein we will be creating 6 kinds of cards. I find it so fun and really challenging. The best part is our friendship goes deeper as we tackle the challenges. I get to know them more because aside from playing together in making the cards, I get to see how they expresses their creativity for the day's challenge. And the most awesome part, we're gonna swap the cards amongst us as soon as the last challenge is done hihihihihihihihihihi. Can't wait to have their cards hahahahahahahaha.

First Day Challenge : The twist of this challenge is we will be using stamped images to make a kaleidoscope instead of a picture.

When I read the challenge I almost fainted coz that will be difficult for me hahahahahahhahhahahaha plus need to find the right measurements for each layer.

Anyway, here's my card and I pray that I did well =D
Size of the card is A6 (big huh?!) I kind'a like the distress look of my card all because of forgetting to rub-off thin layer of the stamp using sandpaper.

Materials Used:
Sizzix Texturz Plate - Tween Flowers and Leaves
Stampin' Up Happiness Rubber Stamp
Stickles
Ribbon by American Crafts
Felt Bird
Bronze and Gold Beads
Stampin' Up Pads ( Almost Amethyst, Mellow Moss, Perfect Plum)
CTMH Pads ( Goldrush, Blush, Desert Sand)


0

2nd Batch of Christmas Cards

Last Oct 16 afternoon till late evening, I got so bored at home. I ended up getting bored coz I don't exactly know how to organize my other room at the basement. The room is filled with more of my craft materials ... spring and summer clothes .... shoes of all sorts .... my ever-growing collection of bags .... cuttleries .... and boxes of toys and clothes that my son no longer use. For me to organize that room needs a miracle hehehehehehehe. I ended up picking all the plums from the ground at the garden and threw. After that, I went to my craft room and created few Christmas cards.

I was so determined to use 3D-decoupage on every card for the day coz I've got few left-overs from last year. No stamping on this batch of cards except for 2 cards but did play with some of my Martha Stewart punchers and Cuttlebug embossing folders. I used ribbons, pearl makers, and stickles plus my son's reindeer mini puncher and "God Jul" letter puncher.

Click the photo and you will be directed to my gallery for detailed viewing of each card.
0

1st Batch of Christmas Cards 2009

While hubby was busy helping her daughter last Oct 8, my step-daughter, move things in her very first own apartment, I opted to stay at home and tried my best to start creating Christmas cards to be sold. Last year I sold 100 cards making those for a very limited time. This year, I thought of .... got inspired to start making the cards earlier.

Mostly, I played with stickles, embossing powders, dimensional glue, Just-Rite Jumbo stamps, spellbinders, wooden embellishments, few holiday stamps that I have, embossing folders, and of course ribbons.

Will try my best to make some more ... at least everyday so I will have great cards to be sold.

Click the link below to see each card =D
http://jerosha.multiply.com/photos/album/154/My_Christmas_Cards_for_the_Day_Oct_08_2009
0

TDS Issue #18

Geez! Why do I always forget to update my blogger? :(

Mid this week, next issue of The Daily Scrapper (issue #19) will be out and I'd better inform you all about Issue #18.

Go check out what we have for this issue coz it's all about halloween =D. I created lollipop wrappers this time.

Here's the link = My lollipop wrappers
0

Issue #17 The Daily Scrapper : Autumn Fever

Autumn is definitely in the air here in Sweden :( It is the time of the year when we have to prepare clothes for such cold breeze outside. I have finally put out all autumn and sort of winter clothes and bye-bye to summer clothes now hidden in the basement. Boots and scarves are neatly arranged with matching bags (of course) hehehehehe.

One of the things that I do in preparation for autumn season is to make our home warm - blending with shades of brown, golden yellow, and deep red. For The Daily Scrapper Issue 17, I created a table top wreath as part of my decorations this year.

Check out my creation by clicking
http://www.thedailyscrapper.com/2009/issue17axn/Hybrid.html

Now, don't forget to grab the digital kit freebie
http://www.thedailyscrapper.com/2009/issue17axn/interview_rubyrynne_kit.html

Here's the schedule of downloading so you will all take note of it =O

Recipe Book {PART 1}:
schedule: September 25 - October 01 [available]
coupon code: rubyrynne_recipebk1

Recipe Book {PART 2}:
schedule: October 02 - 08 [available next week]
2

Issue #16 The Daily Scrapper : Family Keepsake

Hi everyone! How sad that I haven't created anything yet since we got back from Greece :( I have other priorities for now so I seldom stay in my craft room. I have so many ideas and my hands are itchy to create something but I have to back off at the meantime.

Well the good news is that The Daily Scrapper Issue #16 is out!!! Try to spare few minutes and check the latest issue. I altered a canvass frame and turned it into a family keepsake bag/box. The objective of my bag/box is to be filled with pictures of my childhood. Inside the bag/box I attached a 2 ring binder so photos are well organized.

Forgive me for posting this info so late - I'm just juggling my time being a mom, wife, and a friend. Need to play soon in my craft room!
0

Hello Kitty Envelop Cards

I bet all of us were once crazy over SANRIO products most especially the lovable and cutie Hello Kitty. Would you believe I still have my collection ... brought here in Sweden? hehehehehehehehehehe I was planning to give it to my daughter but got a son instead heheheheehehehhehe.

Creating these envelop cards made me smile from the start to finish, created midnight of July 30, 2009. I created these cards for 6 very special girls whom I never met (yet) but are all very dear to me. Some of them already celebrated their birthdays but some I believe will be celebrating. So, each envelop card pocket has a birthday greeting and the other pocket is filled with my gift(s).

I just got a word from the 6 girls sweet grandma that all girls so love the card especially the brooch that comes with each =O

By the way, just don't mind how I tied the ribbons. I did my best for an hour hahahahahahaha but only 1 card has the perfect ribbon. Geez! Need to practice again. It was a long time since I made cards :D

To see all six cards in details, click here =O

Materials Used:
Hello Kitty BookMarkers
Pearl Maker
Prima Flowers
Ordinary white a5 envelop
Stampin'Up Punchers : Ticket Punch and Round Tab Punch
Left-over cardstocks
1" Ribbon from Korea
Silver Glitters
Color Box Stamp Pad
0

Issue #15 The Daily Scrapper : Monochromatic Theme

The Daily Scrapper Issue #15 is out!

For this issue I did not create any hybrid project in a monochromatic theme but was able to contribute a digital scrapbook layout using Érica Mathia's Exclusive Kit for TDS "Know Me". She is from Brazil and started designing her kits at the end of 2007. Her "Know Me" kit is really cute! - filled with happiness and colors that anyone will fall in love with. I made the layout while I was in Greece enjoying our family vacation.

Hope you have the time to check my layout and know more about
Érica Mathia. The awesome part is her kit is now free for downloading :D


Know Me {PART 1}:
schedule: August 28 - September 04 [available]
coupon code: ericamathia_kme1
Know Me {PART 2}:
schedule: September 05 - 10
coupon code: coming soon
Here's the link to the free kit and that's where anyone can see my layout :)
http://www.thedailyscrapper.com/2009/issue15gst/interview_ericamathia_kit.html

Happy Scrapping!
Happy Crafting!
0

The Daily Scrapper Issue #14 : Back To SChool and a Free Kit

Geez! I forgot to inform you guys while I was in Greece, the The Daily Scrapper Issue #14 is out! For this issue our theme is no other than "Back To School". I created something for my son's class and I hope you guys have the time to view it. Also, a dear friend and fellow crafter, Joan Switalski, also created a very cute project for the said issue :D

View our creations here :D


Of course TDS is giving away a digital kit. Although the Part 1 has expired, you may still download all the direct links posted. Then, hurry and download Part 2 which will end by 27 August 2009!

See the free kit below and I'm sure you will love it!

Here's the link to the page of free digital kit :D

Happy viewing!!!
Happy downloading!!! 

Happy crafting!!!
0

TDS Issue #13 : Fairytale/Fantasy Theme

Oh yeah! The Daily Scrapper Issue #13 is out and making a buzz!

For this issue we have a fantasy/fairytale theme. As part of the hybrid theme, I created a 19 pages Fairytale Book entitled "Life Itself is The Most Wonderful Fairytale of All".

I was also tasked to write an article :D

Writing the article and creating the fairytale book is in a way a revelation of who I am and what I believe in life. A reader can easily see a glimpse of my life all in the name of Love.

Oh yeah, I still believe in fairytales ... magic .... dragons .... unicorns ... fairies ... santa ... trolls .. goblins ... witches .... middle earth .... and of course Princesses and Princes.

Hope you guys have time to read the whole issue of TDS and I bet everyone will gain something out of it.
0

The Daily Scrapper Issue #12 : Travellers Keeper

Hi everyone!

Once again I created something for The Daily Scrapper and it has something to do with traveling. Don't forget to download the pattern at TDS just in case you would like to make one for you. If you need assistance, don't hesitate for I am just a click away :D

By th way, don't forget to join the TDS Studio- all members will get the finest digital art for scrapbooking. As said by the Studio Director herself, Alice Koh, every 2 weeks a new kit is introduced at the Exhibition hall. There you will find the description of the design and the inspiration behind it. Imagine, 24 superb digital kits inspired by the most talented of digital scrapbook designers throughout the year.

0

Digital Kit Freebie at The Daily Scrapper, Issue #12


This cute kit especially designed by Jen Yurko TDS Issue 12. This kit is separated into 2 download schedules in the TDS Store.Don't forget ladies to add the coupon code to get it for FREE.

Hurry coz the 1st part is downloadable until 23 July 2009

Here's the schedule:

Another Summer Blend {PART 1}:
schedule: July 17 - 23 [available]

Another Summer Blend {PART 2}:
schedule: July 24 - 30
0

The Daily Scrapper FREE Digital Kit, Issue #11


Hello fellow crafters!

Anyone interested to have this Gotta Pixel Sponsored Collab Kit "Tropical Retreat"?

Check this out -
http://www.thedailyscrapper.com/2009/issue11afc/interview_gottapixel_kit.html to have an idea how to get it because The Daily Scrapper is giving it for free but on a limited time.

TROPICAL RETREAT {PART 1}:
schedule: July 03 - 10

TROPICAL RETREAT {PART 2}:
schedule: July 11 - 16
0

I'm Officially A Digital Hybrid Designer for The Daily Scrapper

Some of you may remember that I was once featured at The Daily Scrapper and it's all because of my Altered Clocks I made August 2008. It was my first time to be featured on an all-english site hihihihihihihihi.

April 14 of this year, I got an invitation to be part of the Hybrid Team. I read the invitation over and over again and tried to pinch myself if I'm not dreaming. I had to take a walk and have a quiet moment - thinking If I'm worth to be part of such a GREAT and highly acclaimed online magazine.

Oh yeah, oh yeah, oh yeah! I accepted the invitation and informed the kind owner, Ms. Alice Koh, that I will be able to participate as soon as I get back from our Philippines trip.
You just don't have any idea how itchy I was to inform all of you that I'm one of the Digital Hybrid Designer for The Daily Scrapper. I had to hold it as a secret all this time until this day coz I'd rather inform you all when I have finally participated and created something for TDS.

Please spare a little time and visit Hybrid Projects of The Daily Scrapper. Feel free to browse the entire magazine and I bet you guys will love what we have there.

If you're excited to see what I created with tutorials, click this - http://www.thedailyscrapper.com/2009/issue11afc/Hybrid.html. But I really hope you all will get to see and read all the pages.

See you all at the next issue :D
2

Amanda's Gift Bag

When my step daughter turned 20 last April 28, my son and I were in the Philippines for a 1 month vacation. I totally forgot to give the gift before our trip. It was only the other day I remembered that the gift is still here at home and true enough I found it at the basement 5 minutes ago. I bought 2 cool shirts for her which she can use come autumn. To pack her gifts I decided to alter a paper bag of medium size which I got from Uppsala Färg store when I bought pens a long time ago.

Here's how it looks like after altering :D

2

2 Transparency Cards

I have longing to make cards using transparencies since last year but with so many things to do I had to put it aside and wait for the day that I have the itching to make the cards. I'm really a baby when it comes to card making and I have been very honest to everyone about it. Yesterday, I took the plunge playing with my transparencies both ordinary and for color printing. It was kind'a difficult to play with the ordinary one but it came out just fine. The color printing transparency is much better to play with coz any ink will not blot or smudge at all BUT all in all it depends on what kind of approach one will be applying.


The first card I madeI used only cardstocks coz I was kind'a nervous to play with any inks. The flowery Retro cardstock is from DCWV which was adhered inside the card. It gave an effect that everything is adhered at the front page but it's not. Then I used the sentiment stamp #97608 from Inkadinkado. The wooden flower is a cute thing I saw while taking a walk one afternoon ... picked it up ... and saved for future use hihihihihihi. The blue dotted gingham ribbon is by American Crafts. Other cardstocks I used are just left-overs scattering around my craft room.


The second card I made I did try using Staz-On stamp pad then sentiments is by Inkadinkado #97608, too while the flourish stamp is once again by Inkadinkado. Flowers by no other than Prima Flowers :D


0

My Play with Sure Cuts A Lot (SCAL)


Finally I have my Sure Cuts A Lot (SCAL) installed this morning. I had no choice but to play and try it just to know if I successfully installed it. Bhoy! It was not easy for me coz I'm not really well and healthy since we arrived here in Sweden last May 18. My son and I are still coughing like seals and feel a little weak BUT that didn't stop me from playing with my Cricut Expression and SCAL. After installing all the necessary programs and upgrading my Cricut firmware and reading more about SCAL, I took the courage of trying it out.


aaaaaaaaaaaaaaaaaaahhhhhhhhhhhhhhhhhhhhhh I did it!!!!!!!! I was able to cut the name GUSTAF using Mad font from my laptap. I didn't have to use any Cricut Font Cartridges to cut the name Gustaf. Besides, I'm quite sure that there is no MAD Cricut cartridge anyway hehehehehehehhee. Then I tried to cut a hand from my own collection of Wingdings/Dingbats and once again I did it :D


The funny thing is eversince I acquired my Cricut Expression machine, I have not played with the machine yet much more any of my Cricut cartridges hahahahahahaha but of course I will very soon if not later :D With all my Cricut Cartridges, I only got 2 Font cartridges: Mickey Font and Printing 101 but one thing for sure I will not invest on Font cartridges anymore coz I have sssssssssssssoooooooooooooo many fonts in my laptap plus there are thousands and thousands of free fonts that I can just download and can be used with my SCAL. I have been investing on Shapes Cartridges but I noticed that in every of my cartridge, there are words and phrases and I find it cool!!! I 'm really excited to play with all my cartridges but the question is when hahahahahahahahahahahahaha.

The only problem I encountered is when I was about to cut!!!!! I was wondering how on earth I can ever insert the mat and start cutting hahahahahahaha. It took me a few minutes to discover the solution to my problem. Well, I just took one of my cartridge just so I can press the LOAD PAPER mode and UNLOAD Paper mode.

Here are some links that will be of great help to anyone who want to know more about SCAL. The links were actually shared by a great friend :D Before I end, I really want to thank Connsue and Maryann for making one of my wishes come true :D


Sure Cuts A Lot Overview - A brief comparison between Cricut Design Studio and SCAL http://www.youtube.com/watch?v=UlpxIC-JOeE


SCAL Sample Cutting of Own Fonts http://www.youtube.com/watch?v=__Fya1crI-U


SCAL Guide About Fonts - In this tutorial it will help one installing additional Fonts for use with your Sure Cuts A Lot software. This tutorial covers, Fonts Folder Overview, Downloading Fonts, Zip Files / Unzipping, Font Installation, Testing in Sure Cuts A Lot and more. http://www.youtube.com/watch?v=tHeU9UJf2j8


Multi Layered Cutting Tutorial for Sure Cuts A Lot - This tutorial covers: Multilayered cuts with shapes that are the same size and multilayered cuts with shapes that are different sizes. http://www.youtube.com/watch?v=Sbsl5aUrhkE

Sure Cuts a Lot and Cricut making a three-color embellishment - Showing you how to use your Sure Cuts a Lot software, your Cricut machine and three separate colors on one mat to create a football or hockey jersey. http://www.youtube.com/watch?v=VH1WJtdPewE

Ok now I have to go coz I think I will try to play with SGV files and know more about INKSCAPE. I hope my son Joseph will not be craving for mamma after posting this. Otherwise, there goes my play time hahahahahahahaha.

God bless everyone!
4

2009 How I Organized My Room :D

Being the last day of the National Craft Month, I decided to totally dedicate this day by organizing my room. Meaning, I spent the whole day fixing my room and did it up to the last important detail. But of course, from time to time I will be revamping something but as it is now, it is really an organized room. After I have accomplished my goal for the day, I tried to work and see if things are indeed accessible. Oh YES it is :D

I am really happy, contented and fulfilled that I dedicated my whole day by showing how much I cared about my craft materials and tools - and that is by having the discipline of cleaning my room and keeping them safe.

Now, the question is?
Will I be able to maintain the cleanliness? The answer is NO! Simple because I create things and naturally it will be a mess hahahahaha.

Let's re-phrase the question, Will I have the discipline to clean my room after I have crafted for the day? The answer is YES! I will do my best to return things where I got them immediately after I use it because I WILL NOT allow another major organization of my room because it's sssssssssssssssssoooooooooooo tiring!!!! hahahahahahaha I promise myself that everytime I have a new tool or material, I will put them where it belongs.

So there my dear friends and fellow crafters, I, Jerosha Äretun, finally know and learn the true meaning of ORGANIZATION :D

Aren't you guys proud of me? hahahahahahahahahahaha
I did it all by myself without anybody helping me hahahahahahahahahaha

Love you guys!
Thanks so much for the love and support you all gave me and giving me :D

Cheers to our friendship and may God bless us all!


Let me show you the BEFORE and AFTER shots =)


Thanks for viewing =)

I know soon I will be re-organizing again simply because I just can't stop buying things  :P

Back to Top