Showing posts with label Nat'l Craft Month 2010 Entries. Show all posts
0

Entry #94 - NCM 2010 : Spring Centerpiece

Basic Technique for this project is Stamping On Candles.  I hope that you have seen my tutorial on How To Stamp On Candles =)

This project was my last entry in celebrating The National Craft Month last March of this year.  Yeah I know, late posting again for me here at my blogger site, sorry :(

I found a heavy and thick glass vase that is perfect for candles and so I took one of my yellow big candle which is great to use this Easter and stamped a sentiment "Life is not measured by the numbers of breaths we take, but by the moments that take our breath away." It is an acrylic stamp by Cloud 9 Designs - Simple Thoughts: Memories.

After stamping the sentiment, I embossed it with black embossing powder then added prima flowers in spring colors. In every flower, I tucked an ordinary sewing pin using different colors, cool heh?

As for the glass candle vase, I poured some garden green crystals then used MS Deep Edge Punch - floral vine as an embellishment then wrapped and tied a yellow ribbon.


Let's take a closer look!

0

Entry #90 to 93 - NCM 2010 : Layout Toppers

Presenting my layout toppers using the paper napkins I made as cardstocks =)

Why Layout Toppers?

People here in Sweden are not much into giving cards because it has been their habit to buy postcards when they want to keep in touch with someone. Maybe someday, we crafters here will make a bg impact on the populace so they will realize that handmade cards are much heart-warming and unique. Anyway, I don't want to make cards so much but if it will be used as part of a layout then so much the better. but of course if it's bulk order that's another story hehehehehe. Someday I will definitely use these toppers I've made as part of my scrapbooks.

 Stickles
Pearl Maker
Embossed Tag sticker
Kuretake cardstocks fro base
"Thinking of You" Acryclic Stamps by Hero Arts

 Kort och Godt Paper Flowers
Paper pollen bought in Thailand
ric rac band
Creative Hobby Cardstocks
3D Ark by Morehead
3D foam
"Hello" acrylic stamp by Stampendous

Creative Hobby Cardstocks
ric rac band
"Having Fun" Acrylic Stamps by Cloud 9 - Chocolate Chalet
3D Ark by Morehead
MS Edge Punch - Botanical

 Creative Hobby Cardstocks
EK Success Edge Punch - Parisian
"Owl" acrylic stamp by Inkadinkado #97625
"One of a Kind" acryclic stamp by Cloud 9 Design - chocolate chalet
golden yellow crystals for the owls' eyes
0

Entry #82 to 89 - NCM 2010 : Light Up Your Spring Table

Posted 29 march 2010 at my Multiply site as part of the National Craft Month Celebration.
Spring is my favorite time of the year next to Summer.  Spring speaks of hope coz everything around is growing ... roads are being cleaned to start anew ... everybody seems to start having  happy and smiley mood.

Anyway, here are some tea light holders I made which I plan to use and have been using since the start of April. A project that is not expensive to make.

The most important thing for this project is you have to have empty bottles like from Mayonnaise, Pickles, etc. I painted all the bottles - top part - with frosted transparent paint to give a smoother effect.

Also, each bottle has:
Mini Clips painted with celery green and embellished with mini flowers
Wired Bands
Used different edge punchers by Martha Stewart and EK Success.

And for every sentiment I applied:
Tim Holtz Distress Ink Pad - Worn Lipstick and Peeled Paint


You may see my previous projects when it comes to recycling empty bottles:

http://jerosha.multiply.com/photos/album/28/Candle_Glass_Holder_-_Decoupage

http://jerosha.multiply.com/photos/album/185/Altered_Pickle_Bottles_big

and this http://jerosha.multiply.com/photos/album/133/Graduation_Extras
6

Entry #76 to 81 - NCM 2010 : Spring Birds

27 March 2010

I made cute birds and my inspiration was a portion of our bedroom curtain.

Materials Needed:

paper and pencil to draw a bird
cutter or scissors
cereal box or any cardboard
cardstocks in various colors, preferably the thin ones
stickles
hole puncher
nail filer or sand paper
Distress Ink pads or any other stamp pads you have
ribbons
printed cardstocks

A portion of our curtain were I took the inspiration


Procedure:

1. Free-hand drawing of the bird based on my curtain inspiration.  When satisfied with your drawing, cut and trace on a board and your preferred cardstocks.

2.  Cut plain colored cardstocks into 6cm x 13 cm and begin folding hill - valley - hill and so on.  The width of your folds will depend on the cut you made at the bird's body.

3.  Punch holes so you can insert a ribbon.  
I used my crop-a-dile since I made the birds using an illustration board.
0

Entry #75 - NCM 2010 : Mini Cross-Stitch Project "Mini Blossoms"

This entry was posted at my Multiply site last 27 March 2010 as part of celebrating the National Craft Month.  Yup!  very late posting here :(

Here's what I've written that day:

It's Saturday and it means In-Laws day =D  Saturday is exclusive day for my in-laws and they always look forward to that coz aside from having Joseph with them for 2 to 3 hours, we all go to the grocery together then we eat lunch at their place.  I always cook food for them the night before and just bring it the next day for all of us to enjoy.  Not even a sale in the city can break this Saturday bonding moments with them hehehehehe.  Not even parties or dearest friends invitations can break this.  But of course when we are sick or they are sick then we can't go.

Every Saturday of this month, I bring my mini cross-stitch project and do it while we all have a cup of coffee and swedish pastries after lunch.  My DMIL is so good in crochet and cross-stitch, too.  My DFIL is so good in building things and oil painting.  I would always sit beside my DMIL and just do our needle work together.

Finally, this day I was able to finish my oh-so-mini cross stitch project while holding tears.  It was a big relief!!!!!  Clap, clap, clap hehehehehehehehehehehehehe Took more than a month to finish hihihihihihihi .... Thailand then Sweden =)

I know, I know it's not a clean project but it's a good start that I can slowly heal the wounds in my heart when it comes to cross-stitching.  I'm also kind'a disappointed with how it looks coz looking at my previous CS projects it sure has a big difference.

2

Entry #74 - NCM 2010 : Paper Napkin Transfers

This was my entry last 26 May 2010 for the National Crfat Month Celebration with my friends.

Ha! This is a cool tutorial for us who may in a way try to lessen our expenses in buying cardstocks. Some dear fellow crafters calls me "Decoupage Queen" for I am kind'a addicted using tissue papers in some of my creations hihihihihihihi. This time I did not use any decoupage glue but an iron instead.

Materials Needed:

Pretty printed party paper napkins
Iron board
Iron or Craft iron set to medium without using the steam
Glad Cling Wrap
Drawing Pad
Scissors

Procedure?
Will definitely post the step-by-step guide later so all you may try this awesome technique!Let me just update my site first since backlogs are piling up.

0

Entry #73 - NCM 2010 : Christmas in March

This is what I made last 25 March 2010 which I was not able to upload in time.  This project was part of The National Craft Month celebration entry.

Just recycling a CD and used Anya stamp colored with Copic Markers ... highlighted with Spica pens ... then added a ribbon and used pearlmaker.  Since I am addicted to stickles I used silver to glitz the wings of Anya.  The flowers you see are from Prima Flowers.  The sentiment is by Just Rite Stamps which I embossed.  I also used a corkboard backing for the sentiment.  hhhmmm maybe if i should make at least 2 per month then I have enough Christmas ornament this 2010 hahahahahahaha.  But the truth is to date I have not done anything yet :(
2

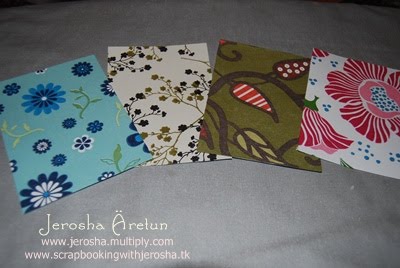
Entry #61 - 72 - NCM 2010 : Designing My Own Cardstock

These were part of my entry during The National Craft Month 2010 and I made these designs 22 March 2010.

I had a hard time finding the right cardstock for an 18yr old client but as I've said I was lucky to find a pack of cardstock from a craft store that is a copy of one of her gown's fabric. It dawned on me that in many cases we can actually design our own cardstock using stamps, stencils, free-hand drawing / doodling or left-over cuts especially from Cricut play =)

Armed with Zig colored pens given to me by a dear fellow crafter ..... some acrylic paints .... stamps ... rollers .... stencils I got free ... and of course imagination, I started designing some 12 x 12 kuretake cardstocks by

1.  coloring after using stencils with the use of craft chalks, markers
2.  freehand drawing then colored with markers or watercolors
3.  just doodling around with flowers and swirls
4.  played with different kinds of roller brushes.
5.  Since I saved most of my cricut cuts, I decided to use those, too.
6.  And of coures the best part is using stamps =)

Maybe to some my cardstocks are too plain but rest assured when I plan to make a LO, the cardstocks will be filled with stuffs. So for now it's juts as is and will check some pictures that I have that suits each cardstock.


Entry #60 - NCM 2010 : Proposed Give-a-way Packaging (3 of 3)

Ok this is the last fo the packaging I'm proposing to my client.  It made me laugh while I was creating the packages coz I hace very limited info on what exactly she wants.  Hhhmmm, they'd better bring samples of the give-a-ways very soon hihihihihihihihihi and can't wait to see my client personally =)

Here's what it looks like:  Heart Bag


Materials I used:

Tags Bags Boxes and More cricut cartridge
Band bought from Philippines
Butterfly sequence
Sunflower stamp by Anna Griffin
Glitter Pens to color the sunflower
"Tack" acrylic stamp by Panduro
just inserted craft tissue showing how the give-a-ways will be hidden inside this heart bag
0

Entry #59 - NCM 2010 : Proposed Give-a-way Packaging (2 of 3)

For the 2nd packaging proposal I made a simpe matchbox.  Since I'm only aware that the debutant will be giving away personalize keychain, I created this type of packaging.  I'm still waiting for the sizes coz I was informed it comes in 3 different shapes.

Here's the oh-so-simple to make matchbox:


Materials Used:

"Charlotte" cardstock by Melissa Frances
Handmade paper
band from Philippines
stickles (yellow)
EK Success Scallop Diamond
bow bought in Thailand
0

Entry #58 - NCM 2010 : Proposed Give-a-way packaging (1 of 3)

21 March 2010

This was really a stressful day for me coz in the middle of my crafting I had to stop since we had to find Joseph's toy that he likes. We went to all the toy stores here but the one he likes is not available. In one store he almost cried coz all the lego items were gone as in totally gone. Why? They had 50% sale and we were not aware of that. We ended up buying his 2n and 3rd choice. So there goes my whole afternoon.

By the time we got back I had to fix the house a little then prepare dinner. But most of all I had to watch my favorite TV show "Ghost Whisper" and every Sunday they air 2 episodes so that means 2 hours hahahahahahahahhaha.

Well at least I was able to make 3 packages for the celebrant to choose. Maybe will make 3 more if I feel like it hehehehehehehe. Oh the celebrant is the one turning 18 which I'm also asked to make her invitations. This is where you can find the first batch of invitations I made at a glance by going here : http://jerosha.multiply.com/photos/album/209/Entry_55_to_57_-_NCM_2010_18th_Birthday_Invitations_Batc...?replies_read=25

Here's the first proposed packaging for my client:  CAKE Box


Materials Used:

Fabiano Cardstock
Melissa Frances "Charlotte" Cardstock
Kuretake Cardstock
Pink band bought in the Philippines
Stickles
Cuttlebug Embossing Folders - Divine Swirls
EK Success Scallop Punch
"Tack" Rubber Stamp by Slojd-Detaljer
Emobossing Powder
MS Edge Punch - Doily Lace
Tags, Bags, Boxes and More Cricut Cartridge
Back to Top