Showing posts with label Cricut - Create A Critter. Show all posts
0

Killing Boredom with Cricut

I have so many things going on in my craft room most especially cleaning.  One thing I'm not happy about is after playing in my craft room I have to clean it but I don't do it immediately so I guess that's my mistake.  Nope my room is still a mess all because I played with my Cricut.  I got bored cleaning coz really it never ends!!!!

First I pulled a cartridge randomly and I got Create A Critter.  Browsing through the guide book I saw the camera and since I have pile of plain cardstock beside me since I was actually sorting and organizing my stash, I decided to make a book project.  Hhhmmm I don't have a clear idea yet on how to go about it but at least I have the pages ... for now =)

Here it is: (I cut it fit to page) so it's big hihihihihihi


Next I took again another cartridge without looking and I got Edge to Edge.  I browse through the guide book and found cute doilies.  I find doily #30 and cut each at 4" =)  It turned out really cute cuts but I think if I will cut it smaller I will be irritated and impatient in removing those bits and pieces.  Hhhhmmmm I wonder if Cricut Explore will make a clean and perfect cut on small sizes.  I'm itchy to buy the latest machine but will wait until late this year.  I'm still in the convincing myself process hehehehehehehe.


Oh well that's it ... for now =)  So many projects that I have to upload but time does not permit!

Happy Crafting everyone!

0

Kiddie Birthday Invites : Knights

I created these invites several months ago for a little boy who is sort of crazy when it comes to Knights.   He is currently so much into it that his mom decided for the said theme.  I truly enjoyed making these cards using mostly Paperdoll Dress Up Cricut Cartridge, an image from Stamping Solutions and Create a Critter Cartridges and of course assembling each card.  Little boy's parents and grandparents were very happy with the invites and for me that's the most important thing. Sad to say the party was canceled a week before his celebration because the cute little boy was very sick.  Oh well, there will always be a next time party =)


Materials / Tools Used:

Paperdoll Dress Up Cartridge
Create A Critter Cartridge
Stamping Solutions Cartridge
Zutter Distrezz It All
"Rays" Embossing Folder by Tim Holtz
Stickles
Kuratake Cardstock
Reprint Cardstock
3D Puff Pen
Hot OFF the Press Acrylic Stamp
Tim Holtz Ranger Distress Pad :  Peeled Paint
CTMH Stamp Pad


DETAILS of the Invites :

The shield(s) and balloon(s) were cut using  Create A Critter cartridge.
The word(s) "Party Time" were cut using Stamping Solutions cartridge.
 
 
 All cuts were from Paperdoll Dress Up cartridge


Thanks for viewing =)

2

POKEMON 7th Birthday Invitations

Joseph is very very happy with his invitations and proud to say we both worked hard on this project. We sure had a grand time together and I made him decide on what embossing folder ... colors of ink pads ... where to put the digital image. He got sad along the way coz he can't help me in every step of the way - torn between cartoons and cardmaking hahahahahahhaha.

In the invitation, it says there that if you cannot attend call NLt 17th. Everytime a parent calls my heart pounded coz I want all his classmates (boys) to attend. It made me and Joseph (especially) when it's just a call to say how awesome the card is and they will not miss the private party.


Materials / Tools:

Different B & W pictures of Pokemon printed on Laser printer and used one image as digital stamp. The other Pokemon pix will be used for coloring books which will be one of his thank you gifts to all the guests (kids).
Tim Holtz Embossing Folder - Rays
Ranger Distress Ink Pads
Hot Off the Press Acrylic Stamp for the "You're Invited"
Cardstocks from CCHobby
Handmade Papers as the base card
Clay machine
Cricut Cartridge - Create A Critter
Copic Markers and ProMarkers
Heide Swapp Edge Distresser
Zig Marker (black) for doodling
Daler Rowny FW Pearlescent Liquid Acrylic - to color the Pokemon clay accent as well as to give highlights on the digital image.
Paper Clay (white)

Procedure:

Joseph embossed the green cardstock with TH embossing folder - rays. I distressed all the edges both the green and blue cardstocks.  Highlighted the edges with Ranger distress ink pad - peeled paint for the green cardstock and broken china for the blue cardstock.

 Swish some Mustard Seed and Spiced Marmalade ranger Distress ink pads to give a sunny rays effect.


After printing out the Pokemo digital image, I colored the image(s) with Copic makrkers and Promarkers.

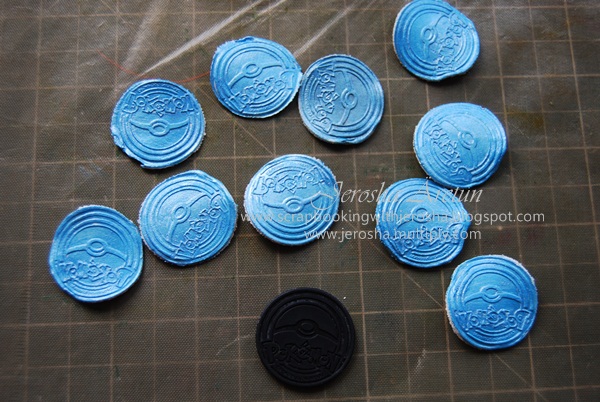
 I borrowed Joseph's Pokemon chip and played with paper clay.


Joseph colored each clay chips with pearlescent acrylic paint.


Although the mass produced Pokemon chips are reverse, Joseph was very very happy.

  Used Create A Critter cartridge to die-cut the words "Let's Play".


 Printed out the given Nikki's invitation card. Nikki's Adventureland is where Joseph will have his private party =)
Back to Top