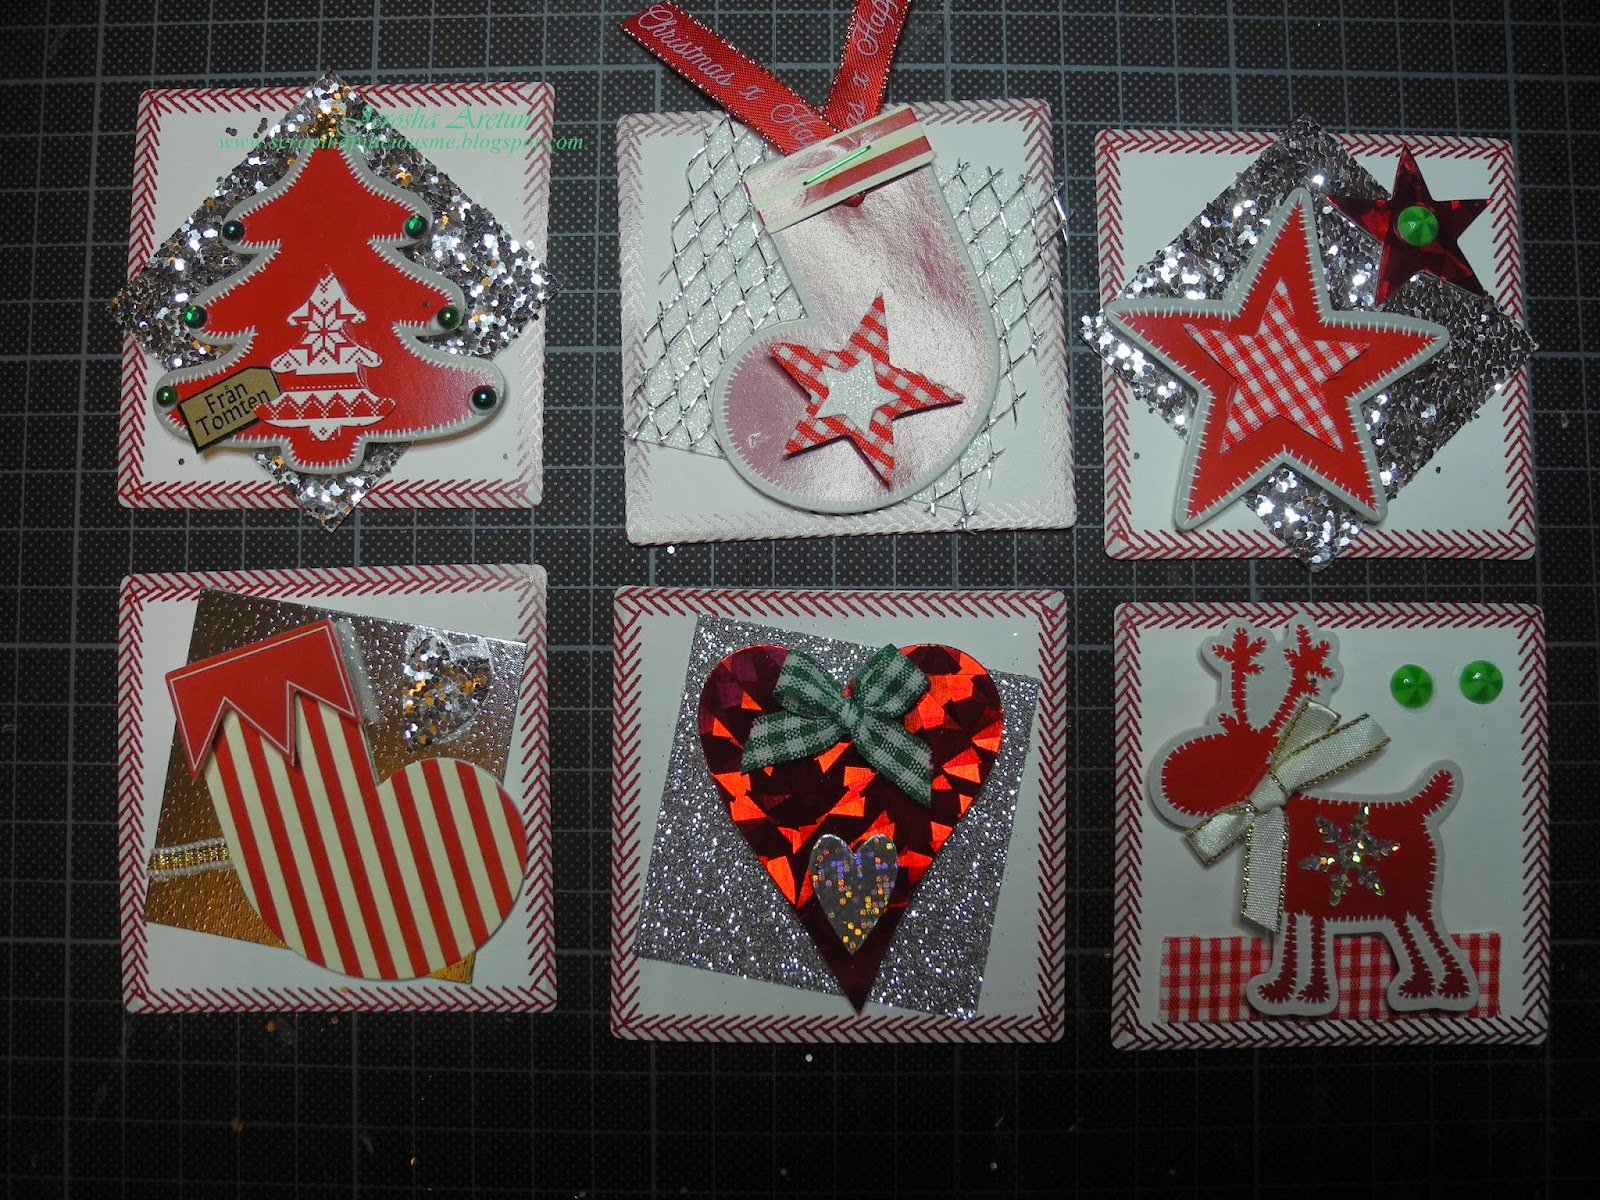
Are you doing December Daily? Is it your first time?
I have finally decided to make my very first December Daily this year. I opted not to buy any materials for this project to make use of what I have in stock which I can honestly say very limited indeed. Oh well, a true artist will survive no matter how limited the resources are, right? So, since late last week I spent hours in creating some toppers for my DD and at the same time for my Project Life pages. I made 3 different sets and each set I created 2 because I planned to share 1 set of each theme in our RAK group at Facebook. Oh which reminds me that few hours from now I will choosing the winners =)
Here's the RED set:
Here's the GOLD set:
Here's the SILVER set:
One set of each theme is mine because I added Swedish wordings =)
Thanks for viewing !
until then.....
0
Upcycled Pringles for Kids Advent Calendar
Last Christmas marked the last time for my son to have and to open an advent calendar. He is now 11 years old and he understands that we will not be preparing a kiddie advent calendar for him. He is sad but at the same time he feels like a real big boy. Oh yeah, he still want to have a box of chocolate advent calendar one can buy in groceries but the problem would be is that he wants one pack a day which in turn serves as his advent calendar. I don't think I will approve of that request - too much sweet for him =)
Anyway, last Christmas 2013 I gathered all the empty pringles canisters which I have been saving for 1 whole year. Obviously we love Pringles hehehehehe. I chose some funky and bright Christmas lightweight cardstock and wrap each canister then accentuated with heart and round doilies, using gliittered gold wrapper I punched gingerbread border using EK Success then numbered clips =) He enjoyed opening each one everyday for 24 days and loved the items found inside, too =) The upcycled canisters served as decors at our kitchen window =)
Simple, easy, and sparkly!
Thanks for dropping by!
Easy Peasy Ornament for Kids
Need a simple DIY Christmas ornament?
Have a bunch of empty tissue rolls?
Your kid or kids would like to help decorate the tree and thus would love to create their own ornaments?
Well, here's a very simple idea my son created last year for our Christmas tree to complement the Angel-like ornaments I did which by the way you may find it here =)
All you need are empty tissue roll, wrapping paper or perhaps Christmas theme cardstock or aluminum tape like what my son used for this project. He knows I collect empty tissue rolls and since he saw that I have excess embossed aluminum tape - left overs from the other ornaments I did, he kindly asked me if I can cut each empty tissue roll into 3 parts like what I did for the Easter Baskets years ago =)
Once all has been cut, cover each with your choice as I have mentioned above.
Add mosaic glass on every wrapped roll.
Glitter glue is perfect to add on top and bottom of each wrapped roll.
Don't forget to add whatever strings you have in hand for hanging purposes =)
Hang!
Easy, right?
until then.....
Tip: How to Add More Sparkle for your Christmas Tree
Christmas is just around the corner we all know that and I am pretty sure that in some countries as early as September plays Christmas songs in malls or stores .... some I bet started decorating their homes and even the front and backyard BUT not here in Sweden .... not yet. Normally the bang starts December 01 and as for me I normally start setting up decorations by the last few days of November since my husband birthday falls on 1st of December. I also wanted to start feeling officially the Christmas season on his birthday.
In every house the Christmas tree is the center of all decors and that's were my tip comes in for me to share with you all. When I was a kid I saw my mom decorating our tree with love, patience, and joy. She would create simple things to hang in our tree then gets busy with her sewing machine for all the curtains in our house.
Anyway, one of the tips she taught me when it comes to decorating a Christmas tree is to first add the lights and/or small mirrors at the body stem of the tree. It will triple the effect of sparkles one would want to achieve. For many years I have been using lights but few years ago I was so thrilled to find a pack of mirror inchies or mosaic glass and yes I had one thing in my mind - for our Christmas tree!!!
Oh don't think that we have a Christmas tree as early as now because this was taken last 2013 =) Yes, I will still be using the glass mosaics year after year =)
just adhere each glass on a band back to back =)
Hang each starnd at the inner part of the tree =)
Ooooooohhhhhh it sure made a big difference! This shot was taken without flash and the whole room glowed with gladness =)
I do hope one of you will try this tip =)
Thanks for reading!
Turning Empty Tissue Rolls Into Angel-like Ornaments
Life for me for the past years have been very very busy that I just have no time to update my blog which is a shame ... I know :( Most of the time if I can I just create things during my free time then time passes so quickly that I have to do other chores or busy at work that I had no energy anymore to sit and dwell in my craft site. What I will be posting is one of the Christmas ornament set that I created way back 2013. It has been a habit of mine to collect empty tissue rolls because I know that I will be able to upcycle it to something cute or useful plus my son normal uses few when he is creating something. This project i would say is not easy due to details but I'm proud to say I did get the flow so everything went smoothly =)
MATERALS:
Aluminum Tape
various Embossing Folders
Mirrors in 1 inch
Empty Tissue Rolls
Christmas Theme Cardstock
Eyelash yarns
various bands
Black Acrylic Paint
Sizzix (Angel Wings) Die
PROCEDURE:
1. Aluminum Tape comes in a roll at about 2 inches in width. Cut strips and emboss for the body of the empty tissue roll =) Then spread some acrylic paint and let dry =)
2. Wrap each empty tissue roll with your choice of Christmas theme cardstock.
3. Wrap the embossed aluminum tape and decorate according to your liking. I added the mirror inchies to add sparkle when hit by the Christmas lights =)
4. As for the wings : Adhere strips of aluminum tape on any cardstock preferably A5 in size then emboss each cardstock then use the Sizzix Angel Wings die. Adhere wings at the back part of each decorated empty tissue roll. Hang and enjoy the sparkle =)
Honestly, I have no idea what I will be making for our Christmas tree this year. My whole family is looking forward to my decorations coz they that every Christmas I have a theme =) I know time goes so fast and I definitely have to come up with a theme this week =)
Thanks for viewing =)
Don't Worry - Be Happy!
Up to this day I'm worried about almost a dozen of packages I sent to fellow RAK-ers at one of my FB group. To date, 20 already got their mails but 11 still floating somewhere :( As far as I know Swedish postal service is really fast (proven nth times) but what I'm worried about is when it gets to the country's destination. I wonder if it really takes almost 3 weeks for them to get it? Weird, coz a lot from US got theirs so how come some US friends haven't got theirs, right?
Heniweys, I made an art journal last night just to release the tension I'm feeling and all I have to do now is just trust in God that soon - very very soon all 11 packages will finally arrive, haist!
Have a great week and happy crafting =)
Heniweys, I made an art journal last night just to release the tension I'm feeling and all I have to do now is just trust in God that soon - very very soon all 11 packages will finally arrive, haist!
Have a great week and happy crafting =)
Great Labels Cut from Small Talk Frames & Tags Cartridge
Ah, finally after 11 hours of sitting down and at the same time cutting images, printing pictures and chatting with my RAK group, I finished cutting all the label images in Small Talk, Frames & Tags Cart. I only cut my fave ones and of course I will be sharing some to my fellow RAKers at our FB group.
I really really really love the said cartridge coz so many images ... if not all ... are just perfect for Smashing and PL pages. This is one cartridge that I don't regret buying at all. Well actually I have no regret in investing with the Cricut Carts. I still believe that I can work with it side-by-side with my Brother Scan N Cut and of course my Silhouette.
Here are the all the cuts I have made for 11 hours yesterday:
Here's a closer look
I had to show the finger pointing under the white paper so you can see it clearly.
Aren't they cute? So useful for any paper projects!
Ok, gotta go ....
Have a great evening and happy week-end crafting to all!
Handy Manny Birthday Banner =)
Remember the Handy Manny Birthday Invites I made for my nephew? Well, what is a birthday party without the banner, right? For me it is an essential item when creating for a kiddie a birthday party. I made a long birthday banner that I believe it is just perfect to hang or adhere on the venue's wall. I maximized the A4 size for each flag and I love how it turned out. Package has already been sent and my nephew was so thrilled - that's what matters most to me.
Materials I Used:
I printed whatever Handy Manny images I can find which was free.
EK Success Robot Edge Punch
Glossy tape
Bubble wraps messed with colors
A roll of woodenfloor print from self-adhesive glossy book cover
Rainbow DP
Reprint Cardstock
Distress Ink Pad for the edges (Walnut Stain)
Cricut - Phrases (banner flags) @ 6 1/4 inches; Birthday Bash (font) @ 5 1/2 inches
Now it's time for me to go to work =)
Have a great week!
Happy Crafting =)
(Week 16) - Journal 52: Recycled Art
I just love, love, love to recycle and upcycle things. Hubby says I'm a nightmare garbage woman hahahahahaha. I really save items like pringles containers, perfume boxes, vitamin tubes, empty toilet paper rolls, etc., etc., etc.! I even pick up items from streets or forests when I go out ... as long as it is clean (touchable) =D
Here's what the prompt says as seen at Journal 52 site : "With Earth Day coming up next week, I thought it would be fun trying to see what we could make out of recycled materials or scraps of projects we already have.
Since RECYCLING is the theme of the prompt, I naturally used one of the acid-free papers I made with my son few summers ago. If you are interested on how we did it then just click the photo =)
Other materials I used are inserts from items I bought at IKEA particularly the numbers and one of my empty perfume boxes. The mini triangles you see are extras I made from my previous journal page, Party Animals. You might be wondering about the doily and that is a cut from Edge to Edge Cartridge which I mentioned on my previous blog post. As for the colorful yarn I found that on the street on my way home from work. Yeah I did also use colorful stripes washi tape and of course my homemade Enamel Dots which I will soon show you the said project especially my lessons learned ... that's another story =D
Now, I have to check our prompt for this coming week.
until then....
Happy Crafting!
Here's what the prompt says as seen at Journal 52 site : "With Earth Day coming up next week, I thought it would be fun trying to see what we could make out of recycled materials or scraps of projects we already have.
For this week’s prompt, create something out of recycled or scrap materials you have just laying around the house. It can be anything – junk mail, newspaper, old books, old magazines, cereal boxes, past “Art Journal Fails” – the sky’s the limit!"Ooohhhh after reading the prompt I was ssssssssssoooooooo excited. Too much excitement that I can't decide what to do. I have done a lot of recycling and upcycling projects which btw reminds me that I have to upload and post here at my craft site. Anyway, yesterday when I had a lunch date with hubby, we decided that we will go to Greece for 2 weeks this summer. I really want to go back to Greece this time because I miss the clean and clear blue waters. Spain is a big NO for me this year coz I got tired of it. We then decided where to go to Greece and that gave me an inspiration for this prompt =)
Since RECYCLING is the theme of the prompt, I naturally used one of the acid-free papers I made with my son few summers ago. If you are interested on how we did it then just click the photo =)
Other materials I used are inserts from items I bought at IKEA particularly the numbers and one of my empty perfume boxes. The mini triangles you see are extras I made from my previous journal page, Party Animals. You might be wondering about the doily and that is a cut from Edge to Edge Cartridge which I mentioned on my previous blog post. As for the colorful yarn I found that on the street on my way home from work. Yeah I did also use colorful stripes washi tape and of course my homemade Enamel Dots which I will soon show you the said project especially my lessons learned ... that's another story =D
Now, I have to check our prompt for this coming week.
until then....
Happy Crafting!
Diving Into Smash(ing)
I am so proud of myself that finally I took out one of my Smash journal and started playing with it. It didn't come easy because all these years I have just been collecting different styles of Smash and I even made two handmade journals for smashing, remember? First I made an everyday all year journal and then I made a Summer travel journal before we went to Marbella, Spain 2 years ago BUT they're still accumulating dusts which is really NOT GOOD!
Well, last Tuesday late afternoon, due to my fellow crafters in our FB Smash group, I received tons and tons of love, support and encouragement from them after I confessed that I haven't taken the courage to start Smash-ing. And so, after reading all their messages and replied, I pulled out the Babay Smash book and decided to preserve all the memories we had with our very loving cute yorkshire terrier dog, Kasper. I was able to play with the cover then the first page. I have yet to print ALL his pictures so I will not be distracted with the flow in doing it.
Really, I thank my group friends because without them I will surely just continue collecting Smash journals.
I am so thrilled about this project as well as my hubby and son because all three of us will make this possible. We have been writing memories lately but yeah we cry in-between. We will even go through the chosen pictures and discuss and write telling the story behind every pix.
Have you been Smash-ing? If not, take the plunge coz it really has no rules. It's like art journaling - every page is beautiful =D
I have MORE books to play with it and determined that it will NOT remain a collection!
I wonder if soon new styles will be released. So far, I haven't seen any :(
Happy Smash-ing!
Happy Crafting!
Playing with Long Forgotten Punchers
Eeeeewwwwww filled with dusts, so sad :( Last 11 April, after reading one of the wishes of a fellow crafter in our RAK group, she mentioned that she wants cute embellishments. As far as I know I already packed and sent the package but to date she hasn't received it yet. Hopefully tomorrow or at least early next week she has it.
I know I'm a bad crafter coz I buy a LOT of tools and materials but it takes years before I think of using it. It's a sickness that I'm doing my best to overcome BUt I know I'm not the only one, right?
Here are the cuties I punched and crossing my fingers she will appreciate the effort if not the items itself.
Looking at all my punchers, I noticed that ( aside from the accumulated dusts) my MS punchers ... most of them turned yellowish. I hang all of it on a rod as well as my Stampin' UP and other brands but all my EK Success punchers are in a drawer. I think I should keep them in one of my drawers. Oh well, that's another story.
until then....
Killing Boredom with Cricut
I have so many things going on in my craft room most especially cleaning. One thing I'm not happy about is after playing in my craft room I have to clean it but I don't do it immediately so I guess that's my mistake. Nope my room is still a mess all because I played with my Cricut. I got bored cleaning coz really it never ends!!!!
First I pulled a cartridge randomly and I got Create A Critter. Browsing through the guide book I saw the camera and since I have pile of plain cardstock beside me since I was actually sorting and organizing my stash, I decided to make a book project. Hhhmmm I don't have a clear idea yet on how to go about it but at least I have the pages ... for now =)
Here it is: (I cut it fit to page) so it's big hihihihihihi
Next I took again another cartridge without looking and I got Edge to Edge. I browse through the guide book and found cute doilies. I find doily #30 and cut each at 4" =) It turned out really cute cuts but I think if I will cut it smaller I will be irritated and impatient in removing those bits and pieces. Hhhhmmmm I wonder if Cricut Explore will make a clean and perfect cut on small sizes. I'm itchy to buy the latest machine but will wait until late this year. I'm still in the convincing myself process hehehehehehehe.
Oh well that's it ... for now =) So many projects that I have to upload but time does not permit!
Happy Crafting everyone!
(Week 15) - Journal 52: Party Animal(s)
Happy Easter everyone! Hope you all had a blessed Easter Week =)
Last week's prompt was about Party Animal(s) and I'm late in submitting since it was a week holiday for my son and had to spend time with him. Before I go on any further let's check the prompt as written at Journal 52 -"For this week’s prompt, make a page about your favorite animal…party hat optional. It can be a pet, an animal at the zoo, or even a completely made-up creature."
Well, here's what I made for the said prompt:
The painting paper was warping so I decided to scan it instead =)
Aside from animal stickers, here are all the materials I used:
The Story of my page:
Every year there is an annual Easter celebration and all the animals are invited coming from different areas. Always as in always the snails arrive too late for the party :( So, this year all the animals in one area decided they will accompany the snails rain or shine and thus it means they have to start the journey a month before just to make sure they will ALL arrive just in time. The birds are cheering and giving the snails support while some animals walk a little ahead of them so they will be protected from evil mishaps.
Oh well gotta go ... need to hang some laundry while the sun is shining so bright =)
Have a great week everyone and Happy Crafting!
2014 Easter Cards for All Our Hardworking Staff
Remember the eggs my son prepared yesterday? Well here are the simple Easter cards that goes with it. Finally at dawn I was able to finish all the cards but sad to say my son suffered :( He couldn't sleep when I'm not beside him but the good thing is as of this writing he is still sleeping and a little bit of snoring. I have to be extra careful when I go into his room so he will not wake up. I'd rather he sleep more coz his bestfriends will be coming over right after lunch to play =)
Here are the cards:
The Cricut cartridges I used are the following:
1. For the bunny base I used Elegant Edges and cut at 5" each.
2. The phrase "Happy Easter" is from Phrases Cart cut at 1 1/2" each.
As for the round scallop, I used my 3" scallop punch.
Have a blessed Maundy Thursday!
I think I will go back to bed ... or better yet try to clean and organize my planet.
Here are the cards:
Here's a closer look. I made 2 cards using masculine colors because we have male Opticians.
I love the subtle effect of the stickles =)
The Cricut cartridges I used are the following:
1. For the bunny base I used Elegant Edges and cut at 5" each.
2. The phrase "Happy Easter" is from Phrases Cart cut at 1 1/2" each.
As for the round scallop, I used my 3" scallop punch.
Have a blessed Maundy Thursday!
I think I will go back to bed ... or better yet try to clean and organize my planet.
Subscribe to:
Posts (Atom)