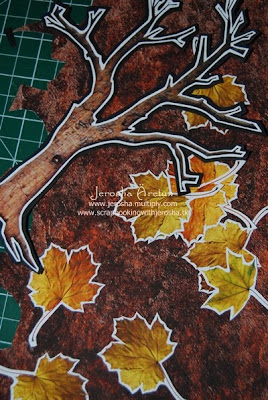
I have made this simple wreath that fits the autumn we had at The Daily Scrapper now TDS Lifestyle. This was published last September 25 - October 9 of 2009 and you may still view it here http://www.thedailyscrapper.com/2009/issue17axn/hybrid_wreath.html
Supplies Needed:
• CBR Autumn Hues Digital Kit by Rachel
• A4 Matte Canon Paper
• Plastic Autumn Vines
• Styrofoam
• Plastic Plant Cup
• Clay Plant Pot
• Ribbons (Orange, Brownish Gold, Yellow – at 2 yards each)
• Autumn Leaf Mega Puncher by Easy Punch
• Scallop Circle Puncher by Stampin’ Up
• Black cardstock (250g) – as base mat for the tree embellishment
• Pictures of Family Members
• Piercing Tool by Making Memories
• Stickles (black, golden brown, lime green, yellow)
• 3D foams
• Jumbo Ice Cream Stick
• Power Tape 1/8 thick
Instructions:
1. Begin by twisting the vines creating a wreath.
2. Secure the wreath on a Styrofoam.
3. Place the finished wreath on a plant plastic cup
4. Choose 2 papers from the kit as your bases/mat and print out (base/mat for the family individual pictures and for the autumn leaves)
5. Print out the tree embellishment, A5 size, from the kit.
6. Print out 12 autumn leaves from the kit according to the size you prefer.
7. Cut out the tree embellishment and mat it using the black cardstock
8. Cut out the leaves and mat each using one of the printed digital paper from the kit.
9. Add stickles on each embellishment and let dry.
10. Once you have all the family pictures ready in round shapes, begin punching scallop circles from the other digital paper.
11. Pierce each scallop using piercing tool.
12. Adhere each photo on each scallop circle using 3D foams.
13. Assemble and adhere each photo onto the tree.
14. Adhere the tree onto the jumbo ice cream stick and secure it in your wreath’s styrofoam.
15. Adhere each autumn leaves on the plastic wreath using the power tape.
16. Tie your ribbons on the clay plant pot.
There you have it, a family table top wreath that will surely brighten up the look of your home.
Subscribe to:
Post Comments (Atom)


 Posted by


1 comments:
Thanks again Maria =)
Post a Comment