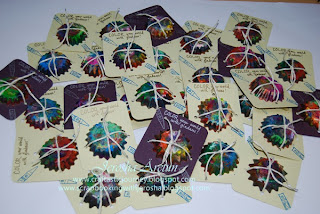
For this project it's really cool to have a kid with you to help coz it's nice to hear ooohhhsss and aaahhhsss from time to time plus those little hands will come handy.
Let's go to the procedure and hoping you'll learn from it =)
1. Gather all the crayons ... remove labels ... segregate each color.
2. Chop each crayon and segregate again =)
3. Choose a mold. In our case at the end we decided to use single tins but let me show you our first choices. Once you have chosen put chopped crayons on the mold preferably in different colors. Let your kid(s) do this part so their hands will be busy =)
4. You have 2 choices in melting the crayons: Either you bake in the oven or use a deep pan and boil water then add the crayons. Now, don't forget that the chopped crayons must be in a heat tolerant container when doing this option.
In my opinion, I prefer the baking option coz it's super easy ...not time consuming plus kids would love to see the melting part.
5. Once baked, let it cool before removing it from the tins. let your kids do this part, too =)
6. Once it's cool and out, you may start packing =)
Now it's ready to be given away =)
Thanks for viewing =)
until then......


 Posted by


5 comments:
love the wild mix of colors you get in each one of those little tins
Thank you so much Paul for the visit =) I also love how the colors mixed and melted.
Thanks Maria :-)
Cool craft for kids. I'd love to try this too with my son and nephew someday Jewels :D
Ails, your son or nephew(s) will truly enjoy this project so I advice you to start collecting crayons hehehehehehehehehehhe =)
Post a Comment