0

How To Achieve What You Want

How does one achieve what he wants in life?  The secret lies to POSITIVE THINKING!  I know it doesn't work all the time but it helps us to be happy everyday and when it fails, we don't need to be sad nor depressed but instead we stand up and move on and try or do our best to achieve again what we want..

My simple formula in achieving what I want in life is this:


DREAM what you want to achieve ...great or small, and when you dream HOPE with all your heart.  Don't let hope die but instead IMAGINE it clearly and continue WISHing that it will come true.  Side by side in wishing, BELIEVE that it is near to grasp ... never cease to believe for God can hear your plea.  But don't just stand there ... EXPLORE the possibilities in achieving what you want to achieve .... DISCOVER the possibilities and opportunities that come your way for if you don't care you will definitely WONDER why you didn't take the chance ... why you didn't care ... why oh why!  Regardless what the outcome would be just EMBRACE your mistakes for there is no one to blame but you.  REMEMBER that God hears and answers our prayers at the right time and if it is for the good of your soul and growth .... remember that God helps but you've got to help yourself, too.

This art journal page I have made at the end of winter wherein we kind'a felt that Spring is just around the corner. 


0

Thanksgiving Wine Glass Markers

Sweden does not celebrate Thanksgiving Day but with Glory Days digital kit by Tempusfigit, I was inspired to create wine glass markers useful for a family Thanksgiving gathering. Each wine glass is adorned with symbolic charm that is significant to what we all should be thankful for. 


Supplies Needed:
Digital Kit Glory Days by Tempusfugit
Shrink Film
Marvy Brush Marker – black
Just Rite Stamps
Memento Dye Ink Pad – tuxedo black
Tim Holtz Distress Ink Pads – Spiced Marmalade, Frayed Burlap, Tattered Rose
EK Success Scalloped Scallop Edge Punch
Color Box Pigment Ink – bronze
Royal Coat Dimensional Magic
Cardstock (left-over)
Rings
Charms (assorted)


Instructions:
  1. Open your editing software and choose the elements from the kit that you want to use and print on a sheet of shrink film, let dry.
  2. Cut each element not forgetting to punch holes on each.
  3. Set the oven according to the shrink film’s instruction as stated on the package.
  4. Let cool after “baking”.
  5. Stamp sentiments on distressed paper and cut according to the size of your preference.
  6. Punch the cardstock, adhere the sentiments, and cut.
  7. Apply dimensional magic on each sentiment and let dry at least 3 hours.
  8. Assemble the wine rings.
 
Symbolic Charms Meaning:

Bingo Card – Laughter: Thankful for the FUN in our lives for we have laughed and smiled alone or with our loved ones.

 Bird – Happiness: Thankful for the BLESSINGS we receive each day that brought happiness and inspiration in our lives.

 Butterfly – Adventure: Thankful for the FREEDOM for in it we are able to spread our wings and discover our possibilities.

 Clock – Life’s Journey: Thankful for the LIFE God has given us for it enables us to have a chance and admire everything around us.

 Hand with Flowers – Family: Thankful for the FAMILY we love and care everyday for without them life would be meaningless.

 Padlock – Traditions – Thankful for the traditions passed on from generations to generations providing SECURITY to our families - a security that one is sure of who he is and what his ancestors were.

 Playing Card – Memories: Thankful for the MEMORIES good or bad that will last a lifetime.

Postal Stamp – Friendship: Thankful for the FRIENDS we have gained all over the world that even though far from each other, we try our best to keep in touch for us to laugh, guide, cry, teach, dream, and create.

Puzzle – Reflections: Thankful for the TRIALS that come along the way for with those trials we have something to reflect about and make us a better and stronger person.

Red Rose – Miracles: Thankful for surviving this polluted world and still giving us good health and sanity.

 What are you thankful for?


0

Make Room For Personality

What is the most important quality you look for in a friend … boyfriend /girlfriend … wife/husband to be … or a group? Majority of people will say ”a good personality”. It is a such a broad word and I wonder what does it really mean? Hhhhmmm, In my opinion the meaning of a ”good personality” differs from everyone. I like happy, funny people, extravert, loving, creative, prayerful, etl.al people while others prefer quiet, studious, and serious people. I praise intellects and I value humor so I stay away from people who are so serious that you have to pay them just to smile or laugh hahahahhahahahahha. I hate when people are over the top sensitive that oftentimes it's OA – overacting! Well, these different factors are considered to be personality traits. Oh boy, now we're dealing with two words =) But let's define PERSONALITY and TRAITS ….

The dictionary defines PERSONALITY as:
  1. Habitual patterns and qualities of behavior of any individual as expressed by physical and mental activities and attitudes; distinctive individual qualities of a person, considered collectively
  2. The complex of qualities and characteristics seen as being distinctive to a group, nation, place, etc.
  3. The sum of such qualities seen as being capable of making, or likely to make, a favorable impression on other people
  4. Informal personal attractiveness; engaging manner or qualities
TRAITS are defined as "a distinguishing quality or characteristic, as of personality."


Hhhhmmmm, so In other words, this means that personality traits are the distinguishing characteristics that makes who you are. It is the unique set of characteristics and qualities that only an individual possess. While a lot of people might have similar personality traits, each person combines these traits in a different way, to create one unique, irreplaceable compact mass of traits that make up their individual personality.

But how does one achieve a ”successful personality”? We have to make room for our personality. We have to be open in experiencing new things and be not afraid of change. Everyone has the right to change but only for the best but how will you know which is best for you when you don't even try. We really have to examine ourselves. We all come from various religious backgrounds, culture, traditions, and beliefs but still we ALL know that we are responsible for our own actions. If we can assume responsibility for the things that have happened to our own lives, and when we can admit that the life we're living today was created as a result of our own actions, then that gives us extreme personal power to change the outcome of our individual life. We have to be open in experiencing new things and be not afraid of change. Everyone has the right to change but only for the best but how will you know which is best for you when you don't even try. When you try and fail just stand up and learn from own mistakes.


0

How To Make Acid-Free Paper

This project I have made July 2009 and was published at TDS Lifestyle October 2009.

 Every paper crafter knows that cardstock is the most important material needed to create cards, scrapbook layouts, in some cases printing digital kits plus we are also aware how expensive acid-free cardstock can be, right? During our paper crafting, we naturally have left-overs bits and pieces, right? I save all my left-overs and arrange it in ROYGBIV in an expandable envelop because I have plans of recycling those and make my own acid-free papers. One doesn’t have to spend money in acquiring all the materials needed to make your own paper coz we all have it in our very own kitchen. This recycling can be done anytime of the year especially if you are blessed with all-year round sunshine.  In my case I have to take the opportunity only on summer time.  


Supplies Needed::
  • Left-over acid-free papers/cardstocks
  • Blender/Food Processor
  • Plastic Basin that can totally immerse the size of your deckle and mold
  • Deckle – Hoop / Frame used for cross-stitching
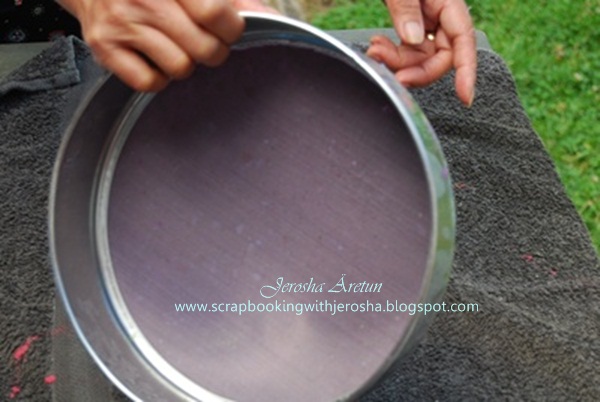
  • Mold- Round flat Flour Strainer
  • Old Towels
  • Liquid starch (optional)
  • Craft White Glue (optional)
  • Sponge
Note: 
If you have no wooden frame and screen available to use as your mold, you may use a flat flour sifter of any shape like what I did. 
 
If you have no basin large enough to immerse your mold and deckle, use your kitchen sink.

Summertime is the best coz you just hang all the handmade papers to dry quickly. During cold or rainy seasons, you may dry each handmade paper by sponging and inserting each on old towels with cookie sheets layer by layer until no more water dripping. This part is best to do in the bathroom or outside coz it can be very messy.

You may add glitters, flat beads or fresh flowers during the process.

Never throw the left-over tiny particles at the end of the process coz you may still patiently create small uneven shape of handmade papers.

Lastly, if you use ordinary papers then you will be creating a NON acid-free and if you will be using your left-over acid-free cardstock then naturally the output would be acid-free.

Instructions:

  1. First is to rip your papers into small pieces and let it soak on water for few minutes. This process will soften the paper fibers and saves time in blending. Place into the blender about half full and fill the blender with warm water and start blending. Usually it takes 30 to 45 seconds to have a smooth and well-blended consistency. If you notice that there are still big flakes, then blend again until you are satisfied. 
      

  2. Now, fill the basin about half way with water and add your pulp and stir the mixture. Remember that the more pulp you add the thicker the finished paper will be. If that happens, just add more water. 

     
  3. If you have plans of using your handmade paper for writing, it is best to add and stir 2 teaspoons of liquid starch. The ingredient will help prevent inks from soaking into the paper fibers. 
     
  4. To make your handmade paper sturdy meaning you can bend the papers, add and stir 2 or 3 teaspoons of white glue. 

     
  5. If you plan to add small objects like flat beads, glitters, or fresh flowers, now is the best time.
  6. Dip the mold into the pulp and then level it out gently by wiggling it side-to-side while submerged until the pulp on top of the screen looks even. 

     
  7. Slowly lift the mold and wait till the water has drained. If you think the paper is very thick, either you remove some pulp from the tub or add more water. If it is too thin, either you add more pulp and stir the mixture again not forgetting to add more liquid starch and glue or simply remove water. 

     
  8. When the mold stops dripping, gently place it on an old towel. Gently press the mold down flat, to drain more water. Then use sponge to press out as much water as possible. Wring the excess water from the sponge back into the large plastic basin. 

     
  9. Here comes the tricky part. – Turn upside down the mold fast to release the paper. If it doesn’t fall-off, gently tap the mold. If it sticks to the mold, you may have pulled to fast or not pressed out enough water. 


  10. Hang each on a clothesline when the sun is shining brightly or when you are sure that no more excess water from towels with cookie sheet lay down each on newspapers. 


  11. Repeat the steps above until you were able to recycle your acid-free left-over cardstocks.
  12. Viola! You just have recycled your left-over acid free papers and may now use as part of your embellishments.
 Here's a sample of handmade paper after adding fresh flowers in the process.

 
 As I've said tiny bits from the process should not be thrown immediately.  Try to make more papers out of it.


Happy crafting!

Happy Recycling!


0

Cutting Scraps for Project Life

Whew!  It will still take months before I get hold of all my Project Life Core Kit(s) :(  I'm really itchy to start doing this project.  Due to my "I can't wait any longer" and "I'' be resourceful" syndrome, I took out my left-over scraps both printed and plain last night.  But before I head on further, I remembered that I need to know the sizes of pockets from my 12 x 12 plastic sheets.  Good thing I did that because not all pockets are 4 x 6 and 3 x 4, I also have the 12 x 6, 8 x 6, and 4 x 4.

I did manage to make use all the left-over scraps and I'm so happy.  Thanks to the very bad movie I was watching while cutting, "Slithers".

So, if you're planning to make your own journaling cards for Project Life, check the sizes you'll be needing.


Back to Top