Showing posts with label Tutorial. Show all posts
0

Welcoming Spring 2014 Hybrid Pleated Card + TUT

It has been 4 days now since our cute dog Kasper, a Yorkshire Terrier died peacefully.  He was 14 years, 3 months, and 10 days old but he was like a puppy to everyone who meets him.  Our house is empty without him and we still can't hold back the tears even if we justify the truth that it was really time for him to go.  I try to drown myself into exhaustion just so I will not feel the pain.  Most of the time I'm at my craft room playing with my cricut or cleaning or just create something.

Here's what I have made since last night:  A Spring Card.  Kasper loves the Spring season and if I close my eyes I can actually see him running around and enjoying the wind.  We would take long walks during this season.  Spring has started here in Sweden and although it is painful to embrace the season, I decided to create a happy Spring card.


The main cover of the card.  I adhered band, then the dragonfly brads and of course applied stickles, too.

The middle part of the card .  I applied stickles on all the flowers.  I used EK Success edge puncher for the grass effect.


 The Tutorial:

Print your choice of digital background and make pleats.


A closer look of the pleats.


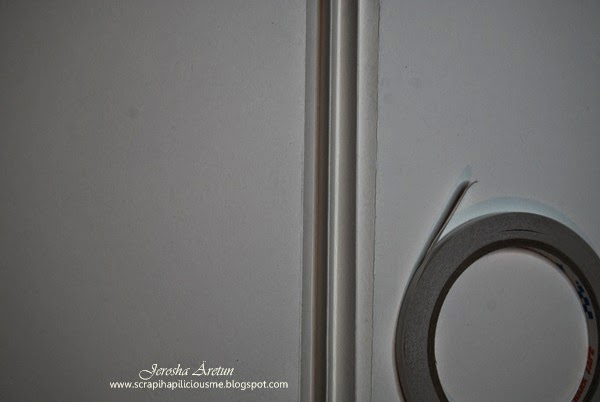
Secure the folds/pleats with a double sided tape. I often use power tape when Im using heavy cardstock.


This is how it should look like.  You will have 3 hills and 2 valleys.  In the valley part that's where you will adhere your middle part of your card.  On the other valley that's where I adhered the grass effect using EK Success edge puncher.


Happy crafting everyone!

0

(Week 12) - Journal 52 : A Day in the Life of Me

Oh yeah I'm not late to submit my entry this week.  Although I'm still recuperating from flu in whcih I suffered the whole week last week, I was just too excited to create my page for this week's prompt.  At Journal 52 blog, everyone will be able to find every week's prompt so go check it out and join the fun or just simply do your weekly pages if you don't feel like joining.

What's exactly the prompt this week?  Here it is:

Week 12′s Prompt: A Day in the Life of Me…

What do you do everyday from the time you wake up to the time you go to sleep? For this week’s prompt, create a page in your journal about your favorite part of the day or the things you do each day. You can collage, paint, doodle – whatever is most fun for you!

I decided not to enumerate what I do upon waking up till I go to sleep but opted to highlight my favorite part of the day ... everyday =)  For this prompt I decided to use my Cricut coz it has been ages I think since I played with my machine.  Yeah, I still need to find time to play my Brother ScanNCut for the first time.  Hhhmmmmm, maybe next week or maybe tomorrow... we'll see !

My favorite part of the day is (drum rolling......)

Having a quiet time with the Lord!  I read the Bible based on the Scriptures for the day then write down what I learned in my Bible journal.  Sometimes I write a prayer based on the readings.  It is the best part of the day for me because I get to intimately talk to God.  I have a habit of praying no matter what I do even when I'm cooking or have to finish my obligations at work or waiting for a bus or riding the car.  I see to it that God is part of my every single move everyday.  Yeah, even crossing the street or taking a walk with our dog, crafting,  etc., etc., etc.


Oftentimes I sing this particular song before I start or after reading the Scriptures for the day with a big smile on my face.  I believe almost everyone knows this song from The King and I :  Getting to Know You.

Getting to know you,
Getting to know all about you.
Getting to (like) know you,
Getting to hope you like me. 


Haven't you noticed
Suddenly I'm bright and breezy?
Because of all the beautiful and new
Things I'm learning about you
Day by day. 


The materials I used are :


So there you go!

Happy crafting and peace be with you =)

6

(Week 11) - Journal 52 : STARS

This journal page is really a late entry submission!  I do have a valid reason and I have been vocal about this right from the day I got the prompt.  Before I dwell on the matter let's take a look at the prompt as stated at Journal 52.  It says.......

Week 11 Prompt: Stars


“For my part I know nothing with any certainty, but the sight of the stars makes me dream.” – Vincent Van Gogh
For this week’s prompt, take inspiration from stars or the night sky. You can doodle, draw, collage, paint – whatever medium is most comfortable for you.

When I got the prompt I knew I will have a difficult time doing my page!  Stars!!!!!

Here's a poem I have written so you will know what STARS mean to me.

I love the twinkling stars high up in the sky.
No one knows how many they are
but one can just imagine that it covers the entire universe.

I always watch the stars at night with my mom and dad
We make a wish ... even wishes from falling stars.
Some wishes were granted some wishes were forgotten.

The dawn has come for my mom to say good-bye
The day has come for my dad to say good-bye
What's left of me is emptiness
Tears were uncontrollable
But I have to live as long as God wishes.

The last words mom told me...
I will be watching you
I will be with you
All you have to do is close your eyes and think of a star
shining bright smiling at you ...
that's me.  I love you!
Thank you for your love and care my daughter.
I know you will be alright for we have raised you
so well with God' love.

The last words of my dad to me ...
When you are sad, happy, confused, worried
uncertain, joyful, victorious, or in pain
Look in the sky and find the 2nd best shining star
for that is me and your mom as one
watching and guiding you.
We can never be the first best
for the best shining star is God.
Look for it and feel HIS love and peace.
I love you
Thank you for taking care of me up to my last breath.

Honestly, it took sssssssssssssoooooooooooooooo much effort doing this entry ... laughter but more tears were part of the process due to memories but I did my best so here it is:


Materials:
Canvas sheet
Black Gesso
Flourescent (Neon) Acrylic Paints by Panduro
Studio Acrylic Paints - Pearlescent
Silver Acrylic Paint by Panduro
Letraset Neon Markers
Glitters - silver, snowflake, and crystal
Crafters Companion Stick and Spray
Balzer Designs Stencil - Burst
Star Beads
Nylon thread plus big hole needle
Faber Castell Pitt Artist Pen - White

The Process:

  • Cover canvas with black gesso and let dry.  I used heat tool to dry it faster.
  • Drop randomly all neon acrylic paints on the sheet.


  • Spread it wildly using a paint spatula and I got this look..... love, love, love the texture!

  • Once dried, spray glue and scatter glitters all over then let dry to make sure it adheres properly.

  • Get your stencil ad using a spatula add silver paint and spread evenly.

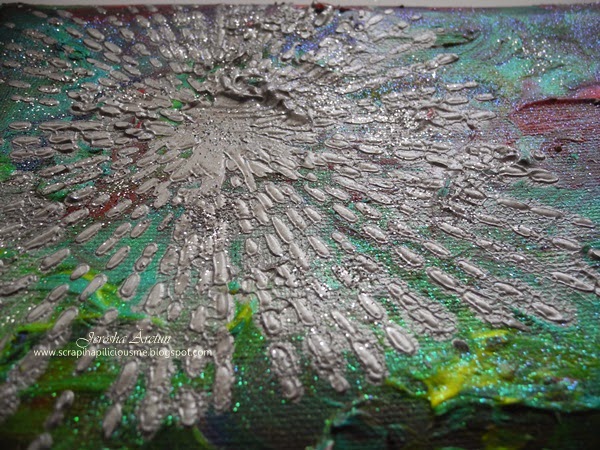
  •  While it is still wet add more glitters and let dry!  FUN!!!!

  •  Make a star and adhere then cover it with silver glitters.  I added red on the sides of the star using Pearl Maker pen.  I used Yellow Neon Letraset marker to highlight the rays =)

  •  Let it dry for 30 minutes coz there are a lot of layerings.  Sew star beads around the edges and write your sentiment.

 I really love the texture, layers, and twinkling of the different glitters I used =)


Ok, now I have to end and post this coz my son is coming home any minute now.

Happy crafting!

0

(Week 10) - Journal 52 : Why Do I Make Art?

That's one question I never get at all!  But for the sake of argument ... or should I say explanation and justification for all the tools and materials I have I will gladly answer the question for this week's prompt.  But first let me orient you on the week's prmot which was given to us by no other than Chelle Stein of Journal 52 =)

Week 10 Prompt: Create for a Cause

"So often we make art, and ask ourselves? Why? What’s the point of this?
Well, art can be used for a number of wonderful things – for health and healing, for personal development, to bring people together, for raising awareness for a number of causes.
For this week’s prompt, create art that has a cause…why do you make art? Or, think about a cause you are passionate about that you could create a page about in your journal."

Now that's deep, isn't it?  I have no cause why I make art.  I do it for myself but maybe someday I will be involved in making art for a cause.  Well, every year I make cards or art works for Cancer month.  Normally a fellow crafter from around the globe will request us to make bunch of cards and send it to her in which she will be giving it to a hospital or an organization.

Anyway, I really, really, really reviewed deeply why I spend money and time/effort in creating crafts.  Most of the time I make for clients ... other times I make it for friends without any reason .... in some cases which is often I create items as gifts ... BUT I really do make art for the love of it and the fun that goes with it.

As I reviewed deeply I was able to summarized my justification et al explanation in 5 pointers:
  • God's Gift - I'm honing and using one of the gifts that God has given me.  I share it by creating and giving and teaching.
  • Balance -  I need to find balance in my everyday life in this crazy world.
  • Sanity - oh yes!  I'm a multi-tasking mom and it will drive me crazy to just do things under the title of a mom, wife, and homekeeper.
  • Enjoyment - I need to do things that makes me happy otherwise hubby and my son will suffer hahahahahahahahhahahaha if you know what I mean.  Plus doing art brings out the child-in-me, don't you?
  • Expression - I do almost all kinds of craft but in art journaling I really get to express what I feel.  There are many ways to express art but I enjoy most expressing my feelings through colors.  Most of all Art is an outlet fro me to express myself as an individual.
Here's my entry for the said week:


The Process:

1.  I sprayed the canvas with colors then used a corrugated board with white paint for some effect on the whole layout.
2.  I used a 3D paint on the stencil for the silhouette effect.  I love how this turned out coz it feels rubbery.
3.  I highlighted the silhouette with stickles thus creating a shadowy effect.
4.  Got some color chips from a paint store and opted to use ROYGBI (yes without the V)
5.  Grabbed my alphabet stamps and decided to emboss it, too.


6.  I had to use a black UNI pen to write the words so it will be readable then wrote my justification.


7.  I adhered each color chip using magic tape.  One just have to flip it to read what I wrote.
8.  Used Faber Castell Pitt Artist Pen (white) and Neon Pen by promarker to write my title question.
9.  Added an angel wing on the silhouette
10.  Last touch is adding question mark paper clips.

Have a great week!

Thanks for viewing =)


0

Homemade Juggle Balls (Tutorial)

Looking for something that kids can play with during autumn and winter?

Figuring out what to include in goodie bags for kiddie birthday give-a-ways?

Well, read on and maybe you will like what I created a year ago for my nephew's baptism celebration.  It was part of the give-a-ways I made for his guests during the said event.  It was my second time to make juggle balls because the first time was during my son's 7th birthday and both events the juggle balls were a BIG hit for the kids!

It's very easy, I promise =)  I assure you kids will enjoy squeezing and throwing then catching these balls.


Let's discuss the materials you'll be needing for this project:

balloons - preferably the thick ones and medium size
5th class rice or small beans or porridge rice like what I have used
small plastics
transparent tape
scissors
measuring cup

 Please be informed that the porridge rice I used is long been expired!


PROCEDURE:

Add 3/4 cup of rice or beans in a plastic.  Twist the plastic to secure fillings then cut plastic at least leaving 2 inches from the twist.

After twisting and cutting the plastic, fold the flap and secure with transparent tape =)  It will not form a ball shape ... yet ... just so you know.


Once you have secured all the plastics, then get the balloons and cut!  Cut each ballon as shown in the picture.  I can't give you the exact size because some balloons have long necks.


Now you're ready to insert all the plastics filled with fillings inside each balloon =)


As you can see we need to cover more the filled balloon.  So get another cut balloon and insert it one more time.  It's best to use different colors of balloons coz it makes the children smile or better yet if you have printed balloons so much the cuter!


All you have to do now is just add a juggle ball or 2 in every goodie bag for give-a-way =)

If ever you tried my tutorial for this day, please let me know and I would love to see it.

Thanks for dropping by!

Happy crafting =)


0

Mixed Media Hybrid Collage: Defining Me

It was difficult to think of a unique project when the theme is Defining Me but so glad I was able to think of this project after a lot of contemplating and decision making. I could have made something that defines me as a mother or as a woman but the best part is just to define myself as a crafter hahahahahahahahahaha.

This project was specially made and was published last Nov 20 - Dec 4, 2009 at The Daily Scrapper now TDS Lifestyle.

Making a collage is definitely full of fun and challenges along the way. But first, one has to have an objective on what the collage is all about. It usually represents who you are or what kind of things you like to do and the list can be endless. With Christine Honsinger’s Clarabelles Collage World digital kit, I was so determined to create a mix media hybrid collage about me as a crafter. Everything you see in my collage has clearly defined of who I am in my craft world.

Defining Me: (As a Crafter)
Orange is my favourite color side-by-side with yellow and gold.
I’m addicted to crystals, beads, flowers, stickles, laces and ribbons among others.
Winter, Spring, Summer, or Fall, I scrap and craft.
I do believe in angels and when I craft I normally think of them and smile.
The world represents the feeling of satisfaction when I took crafting seriously here in Sweden – it makes me feel on top of the world and in-control. It is in this endeavor that I gained lots and lots of friends and fellow crafters world-wide.
The clock – no time of preference and limit when I scrap and craft.
During Summer I try to craft in our garden – flowers everywhere and colourful butterflies plus birds chirping around.
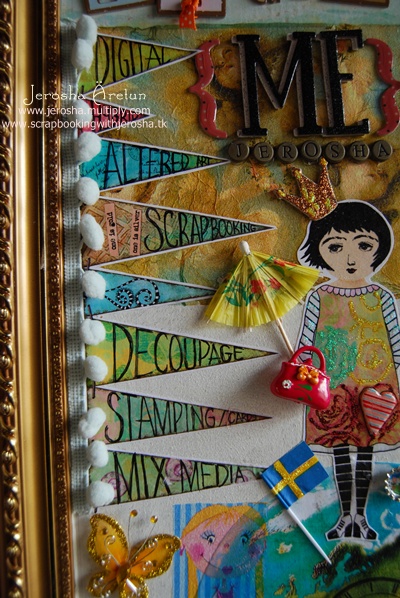
Digital, Hybrid, Altered Art, Scrapbooking, Decoupage, Stamping, Card Making, and Mix Media are the things that I’m so crazy about as a crafter.
The Crafter’s Creed – this is definitely me as a mother, wife, and most of all as a crafter.


 Tools and Materials Needed:
• Wooden Frame without glass – 15” x 38”
• White Acrylic Paint
• Decoupage Lack and Seal
• Decoupage Brush
• Brayer
• Dap Stick Around
• Royal Coat Dimensional Magic
• Stickles
• Waco Pearl Maker – Cream
• Color Box Pigment Brush Pad - Bronze
• Zig Millenium pens
• White Cardstocks
• Provo Craft Alphaletterz Chipboard
• Prima Flower
• Flower Soft - Spring
• Pemacc Crystal Beads
• Heidi Swapp Ghost Clocks
• K & Co Metal Alpha Art
• CChobby laces
• Tilda Pompoms
• Sense Chipboards
• Panduro –metal kite, grossgrain ribbons, wooden heart, mini bottle caps, tissue papers, crown chipboard, Sweden flag
• Philippines’ products – butterflies, pink bag, crystal flowers, wooden flowers with ladybugs

Instructions:

1. Decide on the size of your board frame.

2. Paint the base board with white acrylic paint and let dry. Having a white background is one of the basics in decoupage.

3. Open your photo editing software and choose from the digital kit you prefer to use as your base and embellishments.

4. Print and let dry at least overnight since decoupage technique is one of the best (if not the best) way in adhering everything plus it will make the collage long-lasting and durable. If you have no available decoupage lack, simply mix white glue with water and use flat brush for application.

5. Collect additional embellishments you have from beads, ribbons, crystals, etc.

6. Begin arranging the whole thing but be patient because oftentimes re-arranging takes forever.

7. Once satisfied, you may adhere everything permanently.

8. Let the finished collage dry completely and usually overnight drying is the best.

9. Once totally dry, seal your collage by brushing gently decoupage seal lack and let dry again overnight.

10. Remember: Don’t be scared or apprehensive in making a collage. Create however you want it for after all it is the artist in you that’s working – expressing what you think and feel at that moment under the influence of inspiration you have in your mind.


***************************

The Crafter’s Creed

I will never leave home without my camera, everyday is a potential photo op.
No scrap of paper bigger than my smallest punch shall be thrown away.
I will be there for my fellow crafters to offer help, advise or support, or just an ear for venting.
I will gently remind my family that they will thank me someday for the memories.
I will tolerate husband’s comments as to amount of money I spend for my craziness.
I will NOT point out that he has the thing for loud speakers, TV’s,
electric guitars, and other technologies.
I will not covet my neighbours stamps, punchers, dies, or markers (at least not openly).
I will plan all family vacations to places that have at least one Local Craft Store.
I will always have at least one album in prominent view at all times
should friends, relatives, and colleagues just happen to drop by.
I will faithfully measure my paper stash and run (not walk) to LCS when pile dips below 6”.
I will not show my children the floor plan I have to convert their room for crafting
until they reach adulthood.
I will take at least one picture of myself weekly so that my grandchildren will know
I was really young once.
I will be forever thankful to Mr. Kodak for his wonderful invention.
When my husband is old and gray and reminiscing through my scrapbooks, I will refrain from saying “I knew you would appreciate my obsession someday”
then I’ll snap some pics of him in his rocker!

 Thanks for dropping by!



0

Thanksgiving Wine Glass Markers

Sweden does not celebrate Thanksgiving Day but with Glory Days digital kit by Tempusfigit, I was inspired to create wine glass markers useful for a family Thanksgiving gathering. Each wine glass is adorned with symbolic charm that is significant to what we all should be thankful for. 


Supplies Needed:
Digital Kit Glory Days by Tempusfugit
Shrink Film
Marvy Brush Marker – black
Just Rite Stamps
Memento Dye Ink Pad – tuxedo black
Tim Holtz Distress Ink Pads – Spiced Marmalade, Frayed Burlap, Tattered Rose
EK Success Scalloped Scallop Edge Punch
Color Box Pigment Ink – bronze
Royal Coat Dimensional Magic
Cardstock (left-over)
Rings
Charms (assorted)


Instructions:
  1. Open your editing software and choose the elements from the kit that you want to use and print on a sheet of shrink film, let dry.
  2. Cut each element not forgetting to punch holes on each.
  3. Set the oven according to the shrink film’s instruction as stated on the package.
  4. Let cool after “baking”.
  5. Stamp sentiments on distressed paper and cut according to the size of your preference.
  6. Punch the cardstock, adhere the sentiments, and cut.
  7. Apply dimensional magic on each sentiment and let dry at least 3 hours.
  8. Assemble the wine rings.
 
Symbolic Charms Meaning:

Bingo Card – Laughter: Thankful for the FUN in our lives for we have laughed and smiled alone or with our loved ones.

 Bird – Happiness: Thankful for the BLESSINGS we receive each day that brought happiness and inspiration in our lives.

 Butterfly – Adventure: Thankful for the FREEDOM for in it we are able to spread our wings and discover our possibilities.

 Clock – Life’s Journey: Thankful for the LIFE God has given us for it enables us to have a chance and admire everything around us.

 Hand with Flowers – Family: Thankful for the FAMILY we love and care everyday for without them life would be meaningless.

 Padlock – Traditions – Thankful for the traditions passed on from generations to generations providing SECURITY to our families - a security that one is sure of who he is and what his ancestors were.

 Playing Card – Memories: Thankful for the MEMORIES good or bad that will last a lifetime.

Postal Stamp – Friendship: Thankful for the FRIENDS we have gained all over the world that even though far from each other, we try our best to keep in touch for us to laugh, guide, cry, teach, dream, and create.

Puzzle – Reflections: Thankful for the TRIALS that come along the way for with those trials we have something to reflect about and make us a better and stronger person.

Red Rose – Miracles: Thankful for surviving this polluted world and still giving us good health and sanity.

 What are you thankful for?


Back to Top