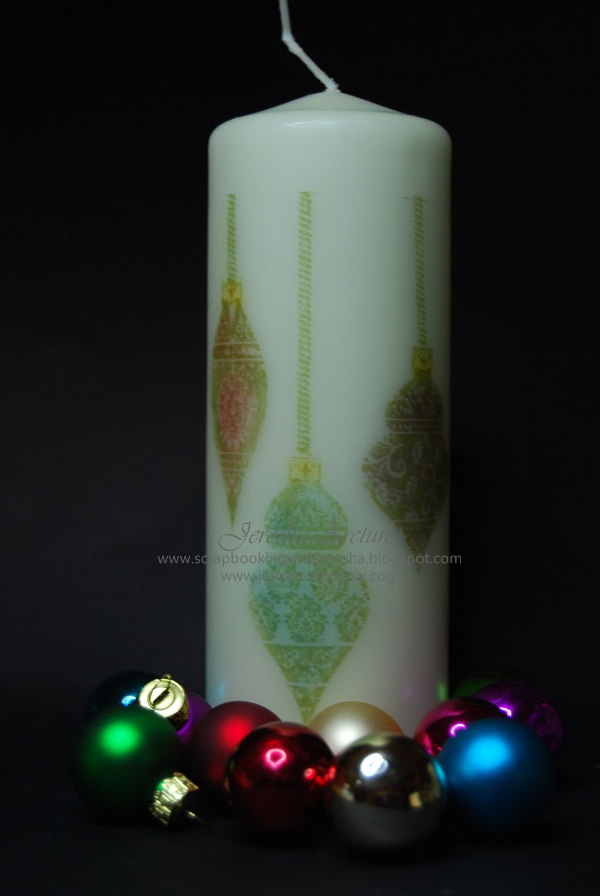
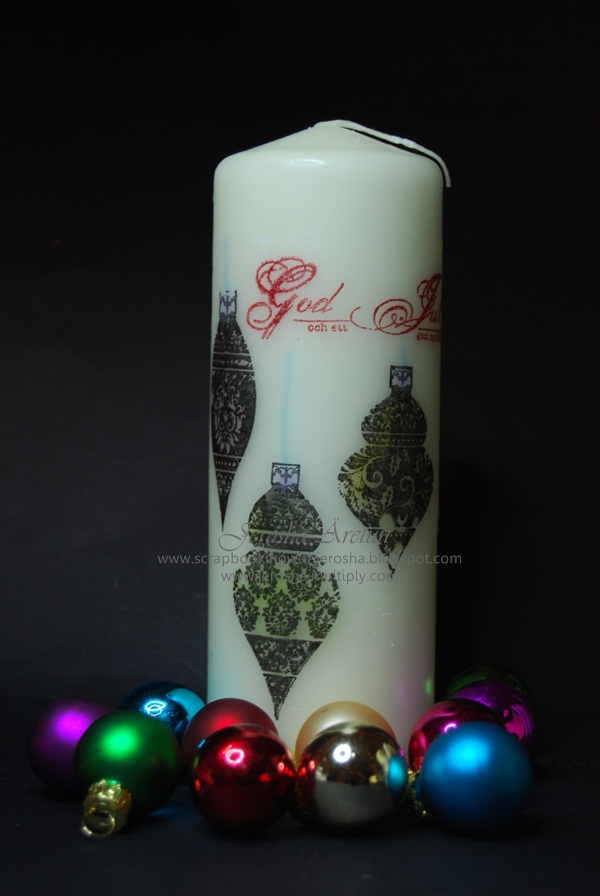
With suck kind of weather I was inspired to play with my tea light candles. I use such candles at our alter and I remember I have candle deco pens in my stash that was given to me by one craft store here. As I was applying it I was not sort of impressed but what the heck BUT then when all the candles were dried I was in awe =) The effect has shimmers ... pearlescent, cool!
Showing posts with label Candles. Show all posts
0
Candle Deco Pen
It's a very very cold Saturday and really foggy! Scary to take a walk or even take the car :( It's so dark outside with the fog then creepy is how it look and feels so we'd rather stay inside and just take things easy.
With suck kind of weather I was inspired to play with my tea light candles. I use such candles at our alter and I remember I have candle deco pens in my stash that was given to me by one craft store here. As I was applying it I was not sort of impressed but what the heck BUT then when all the candles were dried I was in awe =) The effect has shimmers ... pearlescent, cool!
Baptismal Candles
How are you guys? It's almost 8pm here and I have so many things to do particularly in updating my craft sites. It's pay time for me :( As I have checked it's been 5 months that I have not shared anything in the world of crafting and that's bad. In my previous post I have mentioned that friends and relatives are wondering what I have been up to as far as crafting is concerned. Who says being a wife and a mother is easy???? If this this is a paid career then we all would be earning to buy more and more crafting tools and materials hahahahahahahahahahha. Speaking of buying, all these months I hoard and they're all stack-up in both my craft rooms waiting to be played. I can actually hear each one of them calling for me. And so I really promised myself to create anything each day no matter how simple it is. First on my list is to use all my unused stamps side by side with my cricut cartridges.
Anyway enough of my blabberings .....
I did something cute for a darling and chubby baby for his baptism. Once again I did stamping on candles. The stamps I used are from Panduro Hobby, a Swedish brand.
And here are all the candles to be distributed to his Godparents as well as his parents =)
If you haven't tried "stamping on candles" here's a tutorial for you, click here.
Christmas is around the corner and for 2 years now I sell stamped candles like hotcake.
Thanks for viewing =)
Anyway enough of my blabberings .....
I did something cute for a darling and chubby baby for his baptism. Once again I did stamping on candles. The stamps I used are from Panduro Hobby, a Swedish brand.
And here are all the candles to be distributed to his Godparents as well as his parents =)
If you haven't tried "stamping on candles" here's a tutorial for you, click here.
Christmas is around the corner and for 2 years now I sell stamped candles like hotcake.
Thanks for viewing =)
2010 Christmas Stamped Candles
Project Done : 02 December 2010
In past centuries families throughout the British Isles, Ireland, France, and Scandinavia observed Christmas by lighting especially large candles. Home Christmas celebrations took place in the glow of these enormous tapers. Some families lit the candles on Christmas Eve, in which case custom called for the candle to burn until morning. Others lit their candles on Christmas morning and
kept them burning throughout the day. Large candles of this sort were also used in Christmas church services.
People interpreted the meaning of these Christmas candles in several different ways. Many believed the large candle served as a natural symbol for the coming of Jesus Christ, “the light of the world.” Others said it represented the Star of Bethlehem. Many folk beliefs suggest that people commonly viewed the home Christmas candle as representing the family’s future in some way. Denmark people lit two candles, one representing the male head of the household, the other the female household head. Whichever burned out first was said to foretell which of them would die first. Scottish folklore claimed that if the Christmas candle burned out before midnight the family would soon experience some kind of calamity. Scandinavian tradition agreed that bad luck would surely visit any family whose Yule candle burned out during the holy night, possibly the death of a family member. While the flame burned,
however, many Scandinavians believed that the light of the Yule candle conferred a blessing on all it touched. Families brought good things to eat and drink, money, clothing, and other desirable goods within the circle of candlelight in the hopes that they would be blessed with more of these things in the coming year.
Some peoples believed that the remains of the candle retained their power to bless and protect even after Christmas had passed. In Sweden people rubbed the stub of their Yule candle against their plows or used it to make the sign of the cross over their animals. In other parts of Scandinavia people fed the candle stub to their barnyard fowl or saved it as a charm against thunder and lightning.
In Estonia, Germany, and Lithuania people light candles at family grave sites on Christmas Eve. This practice may be linked to old folk beliefs concerning the return of the dead at Christmas time.
I truly believe that I will always be making stamped candles every Christmas time. A great gift for anyone plus a unique gift for any given occasion.
To learn how to stamp on candles you may visit my other craft site entry http://jerosha.multiply.com/photos/album/225/Tutorial_How_To_Stamp_On_Candles_Re-Post?replies_read=18
In past centuries families throughout the British Isles, Ireland, France, and Scandinavia observed Christmas by lighting especially large candles. Home Christmas celebrations took place in the glow of these enormous tapers. Some families lit the candles on Christmas Eve, in which case custom called for the candle to burn until morning. Others lit their candles on Christmas morning and
kept them burning throughout the day. Large candles of this sort were also used in Christmas church services.
People interpreted the meaning of these Christmas candles in several different ways. Many believed the large candle served as a natural symbol for the coming of Jesus Christ, “the light of the world.” Others said it represented the Star of Bethlehem. Many folk beliefs suggest that people commonly viewed the home Christmas candle as representing the family’s future in some way. Denmark people lit two candles, one representing the male head of the household, the other the female household head. Whichever burned out first was said to foretell which of them would die first. Scottish folklore claimed that if the Christmas candle burned out before midnight the family would soon experience some kind of calamity. Scandinavian tradition agreed that bad luck would surely visit any family whose Yule candle burned out during the holy night, possibly the death of a family member. While the flame burned,
however, many Scandinavians believed that the light of the Yule candle conferred a blessing on all it touched. Families brought good things to eat and drink, money, clothing, and other desirable goods within the circle of candlelight in the hopes that they would be blessed with more of these things in the coming year.
Some peoples believed that the remains of the candle retained their power to bless and protect even after Christmas had passed. In Sweden people rubbed the stub of their Yule candle against their plows or used it to make the sign of the cross over their animals. In other parts of Scandinavia people fed the candle stub to their barnyard fowl or saved it as a charm against thunder and lightning.
In Estonia, Germany, and Lithuania people light candles at family grave sites on Christmas Eve. This practice may be linked to old folk beliefs concerning the return of the dead at Christmas time.
I truly believe that I will always be making stamped candles every Christmas time. A great gift for anyone plus a unique gift for any given occasion.
To learn how to stamp on candles you may visit my other craft site entry http://jerosha.multiply.com/photos/album/225/Tutorial_How_To_Stamp_On_Candles_Re-Post?replies_read=18
Entry #94 - NCM 2010 : Spring Centerpiece
Basic Technique for this project is Stamping On Candles. I hope that you have seen my tutorial on How To Stamp On Candles =)
This project was my last entry in celebrating The National Craft Month last March of this year. Yeah I know, late posting again for me here at my blogger site, sorry :(
I found a heavy and thick glass vase that is perfect for candles and so I took one of my yellow big candle which is great to use this Easter and stamped a sentiment "Life is not measured by the numbers of breaths we take, but by the moments that take our breath away." It is an acrylic stamp by Cloud 9 Designs - Simple Thoughts: Memories.
After stamping the sentiment, I embossed it with black embossing powder then added prima flowers in spring colors. In every flower, I tucked an ordinary sewing pin using different colors, cool heh?
As for the glass candle vase, I poured some garden green crystals then used MS Deep Edge Punch - floral vine as an embellishment then wrapped and tied a yellow ribbon.
Let's take a closer look!
This project was my last entry in celebrating The National Craft Month last March of this year. Yeah I know, late posting again for me here at my blogger site, sorry :(
I found a heavy and thick glass vase that is perfect for candles and so I took one of my yellow big candle which is great to use this Easter and stamped a sentiment "Life is not measured by the numbers of breaths we take, but by the moments that take our breath away." It is an acrylic stamp by Cloud 9 Designs - Simple Thoughts: Memories.
After stamping the sentiment, I embossed it with black embossing powder then added prima flowers in spring colors. In every flower, I tucked an ordinary sewing pin using different colors, cool heh?
As for the glass candle vase, I poured some garden green crystals then used MS Deep Edge Punch - floral vine as an embellishment then wrapped and tied a yellow ribbon.
Let's take a closer look!
Stamping On Candles
Excuse me but I have to transfer some of my posts from my other craft site before I close it down so hope it's alright with you guys =) Before I share with you all how I did stamping on candles, you may view the first batch of candles I did last 2008, here
http://jerosha.multiply.com/photos/album/91/Christmas_Candles_Personalized
and 2010 candle stamping http://scrapbookingwithjerosha.blogspot.com/search/label/Nat%27l%20Craft%20Month%202010%20Entries
Adding some stamped images on candles can transform a plain candle into something really special. Stamping on candles can be customized to match a room or table decor, personalized for a wedding or birthday, given a festive make-over or simply transformed into your own unique work of art.
MATERIALS:
A Candle
Heat Gun
Tissue Paper (Can be wrinkled, doesn't matter)
Ink Pads (whatever color but water-based stamps works easier coz it dries faster)
Stamp Set(s)
Clean Scratch/Scrap Paper (yeah, it's important!!)
Parchment Paper OR Wax paper (wax paper works really fine with me)
Scissors
Glue Stick
Embossing Powder (if you want to emboss images)
VARIATIONS:
* Images can be stamped and embossed before being applied to the candle.
* Glitter embossing powders look particularly effective..
* Colored tissue paper will give different effects.
* The stamped images can be colored by marker pen, chalks, inks and paints.
STAMPING TIPS:
1. Either solid or open designs can be used. Phrases and word stamps work well if they are fairly large and bold.
2. Metallic and opaque embossing powders works best.
3. Adding a small amount of glitter to your embossing powder gives extra dazzle.
4. Glitter Glue works beautifully for this technique. Just allow it to dry completely on the tissue before applying it to the candle.
5. Loose Glitter makes an interesting texture. With no tissue paper apply heat to the surface of the candle until wax begins to melt. Quickly sprinkle glitter onto surface and apply more heat. It can be messy because you will have no control over where it goes, but it is very pretty. Don't worry coz a tissue image could then be applied on top of the glitter layer before heating.
I suggest you experiment on some old candles first to get the feel of it, and then move on to your elegant holiday or party project. I've tried different brands of candles and some would melt so easily and ruins your project. Usually the very cheap candles is so bad that I prefer to use the not-so-expensive but not-very cheap candles. Some candles burn easily but some when when you light it takes ages before it melts and that's a great candle especially when you have stamped the candles coz friends and families will enjoy the candles for a long time =D
Thanks Claire, a fellow crafter for sharing this kind of art. During my trial session in using different mediums, I learned a lot in personalizing my candles :D
I sold lots of these candles hehehehehehehhe and still selling =)
http://jerosha.multiply.com/photos/album/91/Christmas_Candles_Personalized
and 2010 candle stamping http://scrapbookingwithjerosha.blogspot.com/search/label/Nat%27l%20Craft%20Month%202010%20Entries
Adding some stamped images on candles can transform a plain candle into something really special. Stamping on candles can be customized to match a room or table decor, personalized for a wedding or birthday, given a festive make-over or simply transformed into your own unique work of art.
MATERIALS:
A Candle
Heat Gun
Tissue Paper (Can be wrinkled, doesn't matter)
Ink Pads (whatever color but water-based stamps works easier coz it dries faster)
Stamp Set(s)
Clean Scratch/Scrap Paper (yeah, it's important!!)
Parchment Paper OR Wax paper (wax paper works really fine with me)
Scissors
Glue Stick
Embossing Powder (if you want to emboss images)
VARIATIONS:
* Images can be stamped and embossed before being applied to the candle.
* Glitter embossing powders look particularly effective..
* Colored tissue paper will give different effects.
* The stamped images can be colored by marker pen, chalks, inks and paints.
STAMPING TIPS:
1. Either solid or open designs can be used. Phrases and word stamps work well if they are fairly large and bold.
2. Metallic and opaque embossing powders works best.
3. Adding a small amount of glitter to your embossing powder gives extra dazzle.
4. Glitter Glue works beautifully for this technique. Just allow it to dry completely on the tissue before applying it to the candle.
5. Loose Glitter makes an interesting texture. With no tissue paper apply heat to the surface of the candle until wax begins to melt. Quickly sprinkle glitter onto surface and apply more heat. It can be messy because you will have no control over where it goes, but it is very pretty. Don't worry coz a tissue image could then be applied on top of the glitter layer before heating.
I suggest you experiment on some old candles first to get the feel of it, and then move on to your elegant holiday or party project. I've tried different brands of candles and some would melt so easily and ruins your project. Usually the very cheap candles is so bad that I prefer to use the not-so-expensive but not-very cheap candles. Some candles burn easily but some when when you light it takes ages before it melts and that's a great candle especially when you have stamped the candles coz friends and families will enjoy the candles for a long time =D
Thanks Claire, a fellow crafter for sharing this kind of art. During my trial session in using different mediums, I learned a lot in personalizing my candles :D
I sold lots of these candles hehehehehehehhe and still selling =)
Here are the materials I used when I first tried stamping on candles last Dec 2008
Stamp the images you like on a craft tissue paper and color your image(s) if you like.
Cut the images but at least leave a little ... teeny-weeny space around the image.
Dab a little glue on the stamp image but it's optional.
When cutting a wax paper, make sure it's long enough so you can hold tight the wax paper.
Use your heating tool =) With the help of the heating tool, it takes images that have been
stamped onto tissue paper gently melts onto the surface of the candle.
You will know if the image has been successfully transferred
coz you will see a kind'a like shiny effect when heating.
Subscribe to:
Posts (Atom)
Posted by