2

Drip and Swish with Alcohol Inks

I'm very very tired from work today - hard day for me that I can't wait to go home and relax in my craft zone. By the time I'm home Joseph's with me coz I picked him up from school, too. Thank God for a sunny and hot weather this day coz riding the bike was fine as compared to sunny but windy.

I just started doing Joseph's birthday invitations but had to stop and continue tomorrow or maybe later (if I don't fall asleep with Joseph) coz I wanted to play with my alcohol inks.

Materials:
Glossy cardstock
Alcohol inks
Alcohol Blending Solution
Craft Mat

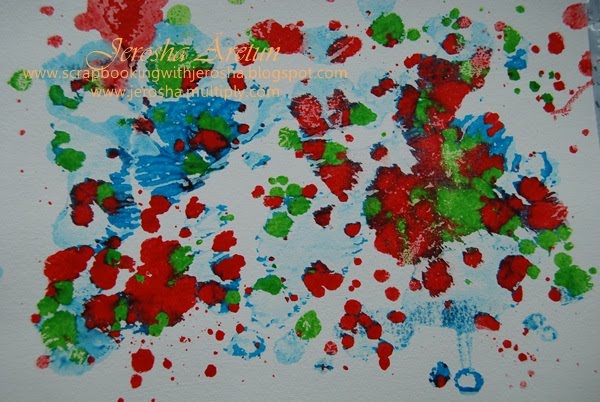
 Gather your materials.

Drip colors of alcohol inks on your craft mat and begin to swish and swish your glossy cardstock.

 These are the backgrounds I was able to make.

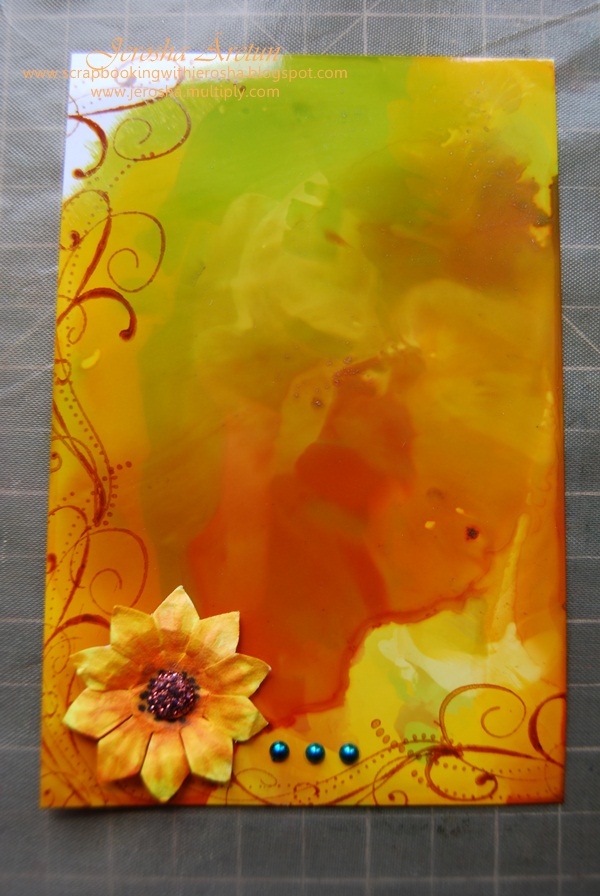
I tried stamping swirls using staz-on ink pads.

I colored a white paper flower with my Copic markers. This I will never do again coz copic markers are very expensive and I got mine from a dear, dear, dear friend and I know how much effort she did just for me to have lots of copic markers.

Then I used pearlmaker to create pearls.

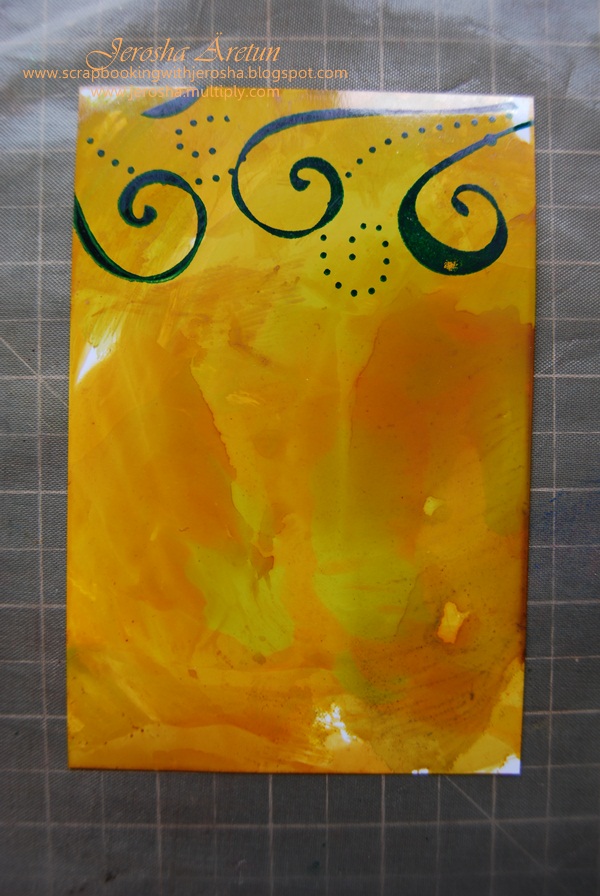
 Just stamping swirls using staz on.
0

Crayola Melt Art

Once again I'm in the mood of sharing a simple tutorial. I'm sure you will remember your elementary or high-school days with this particular tutorial. I'm suppose to start creating Joseph's birthday invitations but not exactly in the mood for that although I have clear ideas in my mind on how to go about. I hear POKEMON inside my head since the other day eager to be released hahahahahahahahahaha. Maybe because I'm free from work this day that I take things easy.

Why crayola this day? I just cleaned Joseph's room and oh my goodness he has a LOT of crayola. It's my fault coz any country we go I buy him materials for crafting plus we get coloring set in every airplane we ride. I actually sneaked out few pieces which I know he will not notice.

Materials:

Crayola
Baking Paper
Iron
Cutter
White Cardstock

Procedure:

Gather your materials (forgot to include the cutter in this shot)

1. Using your cutter scrape some bits and pieces of crayola and just let it fall on your cardstock. It's just ike you don't have a sharpener and you have to sharpen your pencil - the only thing you have is a cutter or knife. Of course you have to make sure that you go around so it's kind'a well distributed all over your cardstock. The more colors you add the better =)

2. Cover using your baking paper.

3. Heat your iron on natural setting and begin to iron until the crayola is melted.

4. Remove gently the baking paper and you will get a nice crayola melt abstract which you can use as background for your layouts or cards =)

 Here's what I made on my first play.

And the second and last play I did.


0

Slide ...or Tap and Press with Ink Pads


As Joseph and I were discussing details about his 7th birthday this coming October 28, it made me realize that he really is a big boy now. Gone are the likings on cutie animals or spiderman so there goes my cute cartridges like create a critters, dinosaur tracks, mini monsters, superman, batman, etc. He likes his birthday theme to be POKEMON (!!!!)

After we have closed the deal that it will be a Pokemon party and that the venue will be at one of the playland here in Uppsala, I started imagining how his invitations would look like plus the give-a-ways. I have so many ideas going in my mind and trying to make a time schedule ... praying that I will be able to send out the invites as scheduled.

While I was just killing time in my craft room ... because Joseph is using my computer - coloring on-line any Pokemon characters hehehehehehehe, I decided to do something that I will share with you and it has something to do with ink pads. For this very simple tutorial I used ranger distress ink pads. I haven't tried using any other ink pads for this project coz I know that ranger distress pads stays wet for a long time.

Materials Needed:

Ranger Distress Ink Pads
Water Sprayer
Cardstock
Teflon mat (don't need to have the branded ones like Ranger/Tim holtz coz the one you use for baking works very well as substitute. In fact, I checked the branded ones and it's so thin as compared to the baking mat)

 Procedure 1

 Slide ink pads directly on your craft / teflon mat. Spray a little with water.

 Press your cardstock and lift.


Procedure 2
try to just tap and press without sliding the ink pads .... creating squares in effect.
Spray a little with water and press your cardstock.


2

Abstract With Acrylic Paints

Tired of the usual cardstocks you find in the market?

Can't find the right cardstock?

Want something different for your layout?

Or maybe you just want to create something to frame ?

Then gather your favorite colors of acrylic paints, white cardstock or painting pads for artists, old credit card and let's play =)

I used pearlescent acrylic paints by Studio so my artworks shimmers =)
In every abstract you make, brings wild imagination when looking closely =)

 Drop some paints on your cardstock ....

Using your old credit card begin to swipe the colors in any direction.

When satisfied, let dry!


2

Shaving Cream Art

This is one of the art things I learned in high-school and I firmly believe that some paper crafters still uses this technique.

I know you will enjoy doing this project but make sure your husband knows where his shaving cream is hahahahahahahahahahahahaha. My hubby wondered why his shaving cream is gone and he couldn't believe that it's in my craft zone =)

MATERIALS:
Shaving Cream
Stick
Inks or Paints
Cradstock
Scraper (old credit card)


 Spritz shaving cream in a container and add drops of inks or paints.

Using a stick begin to swish the inks/paints to blend with the shaving cream.
Dip your paper and press very very lightly and you will have something like this. 
Yup, a cardstock covered with the colored shaving cream.
Scrape off the colored shaving cream and you will be surprised what's underneath =)


And here are my shaving cream art!
 I used refill inks for my ink pads on this cardstock.

 I used Pearlescent Paints on this cardstock that's why it shimmers.

A mixed of refill inks and pearlescent paints on this cradstock.

This was the last of the colored shaving cream and I love the lightness it has done to my cardstock.


0

My Simple Technique in Making Accordion Flowers

This kind of flower has been popular or maybe still is ... hard to tell coz so many kinds of paper flower making is flooding the internet. While I was reading and viewing tutorials I find the procedure so tedious: measure then score and fold those hill valley hill valley thingy. If you're like me who has limited time in crafting nowadays you will really find it tiring.


Since my little boy, Joseph, says this kind of flower is so cute to the point that he even tried making coz the way he sees it one just have to fold and fold and fold hahahahahahahaha. He got frustrated coz it turned out not the way he wants it to be. I made one for him but after that I told him that I can't anymore coz I have to cook and I have no time to measure and score. He was sad of course and watched TV instead.

By the time you have read this entry of mine, he already took all the flowers and will give to her girlfriends in school. Duh????!!!!!

Anyway, if you are interested in making this kind of flower, I'm sharing with you my simple technique - avoiding the measure and scoring part hehehehehehe.

Just go over the pictures and you will find the step-by-step guide =)

 You may cut wider strips of paper but be aware that the wider the paper 
then the flowers will be bigger in diameter.


 Attach this to your base and add a brad or a button or a small chipboard =)


 If you will look closely you will see the stickles on every flower. Joseph did that and I find it great =)

2

2nd Time with UTEE : Puzzles and Stamping

Ha!  I'm quite happy with my second time around to play with UTEE but I avoided using any moulds or cookie cutter this time coz I don't want to be frustrated again.   Interested to see my failed first UTEE play?  Then simply click http://scrapbookingwithjerosha.blogspot.com/2010/09/failed-utee-pendant-project.html Will just try working again with mould and cookie cutters later tonight if I have time.

I'm free from work today but got a heavy date with the washing machine.  I will try my best to create anything this day either tutorial or just simply playing.  I know I have to clean my craft zone but that can wait ... as always bwahahahahahahahaahhaha.

Let's go back on my UTEE 2nd play.

Joseph has a lot of puzzles in different sizes and so I asked him which ones he doesn't like anymore.  Ooooohhhh I got 4 sets that he doesn't like coz some bits are missing which is then perfect for me to play with it.

MATERIALS:

Puzzles ( made of thin wood)
UTEE embossing powders (gold, black, and bronze)
Embossing ink pad
Heat gun
Rubber Stamps by Panduro, Slojd-Detaljer, Rubber Stampede, and Laura Ashley
Art Metal Paints (Pewter, Antique Gold, Bronze)
Perfect Pearls ( Kiwi, Blue Smoke, Rust)
Note:  Always work with craft mat like the Teflon baking sheet

PROCEDURE:
Since it's just a trial due to curiosity, I took only 6 pieces of puzzle.

  • I dab embossing ink pads on each puzzle.
  • Sprinkled it with clear UTEE then melted with the help of heat gun.  Did this step 3x.
  • While still hot I stamped the image using rubber stamps and let it stand leaving the rubber stamp on it.  I would like to stress rubber stamps coz if you use acrylic stamps it will ruin your precious stamps.
  • After a few minutes I removed the rubber stamp gently.
  • You may end from here but if you want to add shimmers then brush each with perfect pearls and paint the sides and back with metallic colors of your choice.
 See I told you I'm just quite happy coz I lost control with my heat gun on the very last puzzle.  
I know I can re-melt it but too sleepy late last night. 

I love how UTEE captured every small detail of each stamp =)


0

Transparency Lollipop Flowers

For now (hopefully) you have seen how I made cardstock lollipop flowers ( http://jerosha.multiply.com/photos/album/253/The_Easiest_Flower_To_Make_Lollipop_Flowers ). This time I made lollipop flowers using ordinary transparencies. I say ordinary transparencies because I don't want to waste my transparencies specifically used for color printing. Both kinds of transparencies are very very expensive here and good thing my brother gave me boxes two years ago.

I really love the effect of the transparency when I made this project. I was careful in using the heating tool and it was fun getting messy with the alcohol inks and distress pads.


I got the alcohol inks in one of the surprise packages DH gave me during my birthday last month then the feathers I got from my DMIL. She gave me packs of different colors of feathers and I was really happy coz I noticed that using feathers is one of the "in" thing right now with paper crafting. I saw some cards and traditional scrapbook layouts adding feathers that in a way gave a vintage look.

MATERIALS:

Ordinary Transparencies
Alcohol Inks
Embossing Folders
Staz-On Ink Pads
Heat Gun
Brads or buttons
Rhinestones (Optional)
Leaves and Feathers (Optional)

PROCEDURE:

You may create bigger or smaller flowers than the ones I made but for my project I decided to freehand cut circles with the size of 1 1/2, 2, and 2 1/2. Freehand cut is better coz it will give character to your flowers.

 Each transparency circle were embossed using Tim Holtz and Cuttlebug embossing folders. 
After embossing I just inked each with alcohol inks.

 Then to highlight the embossed parts, I gently swiped staz-on ink pad and let dry.

 I applied staz-on ink pads on the edges and let dry again.
Once dried I used my heat gun to have a crumple and burn effect. I was very careful in doing this.
Note: if you heat too close you will lose all those embossed areas - it will flatten back so just be careful.

 Layering and embellishing. I used stickles again on each flower and even on those flower brads then I attached the leaves I made using the paper crimper.

 I don't know if you can see the feathers I have attached. gggrrr don't know what went wrong when I took this picture.

To see how I made the leaves just read http://scrapbookingwithjerosha.blogspot.com/2010/09/crimper-and-paper-textured-leaves.html


Back to Top